Quantcast
Channel: John Mark Power, Antiques Conservator
Viewing all 57 articles
Browse latest View live

Poplar Corner Cupboard (ca. 1850 and 1920)

$
0
0
Recently I completed the restoration of a really interesting piece. I was in a local antiques store called the Gilded Flea (http://www.gildedflea.com/) talking with the owner and looking at the new arrivals. As I was about to leave I noticed corner cupboard, which up to that point I had completely missed. I happened to have a customer who had been hunting for a corner cupboard. One stipulation was that the top be open for displaying purposes. I took a few photos and measurements and sent them to my customer, who bought the piece almost immediately.

A few days later I returned to the Gilded Flea with my van and transported the cupboard to my shop. Once the cupboard was in the shop I started to look it over to get an idea of what repairs needed to be addressed as well as get acquainted with the piece. Below are the original photos I took of the piece while it was displayed in the Gilded Flea.


Dwayne, The co-owner of the Gilded Flea, had informed me that the piece was signed on the back. Below is a photo of the signature. The photo that follows is a doctored version to help clarify the signature. The signature reads "William Henry Dietz- Rt.1- Manchester"

A little digging revealed that the only instance of Route 1 going through a town named Manchester, was in Virginia. It turns out that the south side of Richmond which lies on the south bank of the James River was originally a separate town named Manchester. Manchester was annexed by Richmond in 1910. Route 1 crosses the James river over Belle Isle and passes through Manchester as it heads south. A little more digging revealed that Route 1 was laid out around 1920. While these dates do not overlap, it is easy to imagine that a cabinet maker who grew up in Manchester would have continued to call his home town Manchester even after it was annexed by its neighbor. The only thing was that the base was clearly much older than these dates. Closer inspection revealed that while the base was signed by William Henry Deitz, it was signed on replaced boards in the back. Most likely, Mr. Dietz had the base, which probably dates to around 1850, fixed and refinished it, and built the top to fit the base. The top has several design elements that place it in the twentieth century, and the nails and saw marks are consistent with this. The base is pegged and square nails were used, pointing towards earlier construction. Both top and base were made primarily of Poplar.

The final conclusion that I have come up with is that the base was made around 1850, probably in Virginia. Around 1920 or so Mr. Dietz got a hold of the base and repaired and restored it. In addition, he made a new top for it complerte with doors. The doors are currently missing, which suited my customer just fine, since she was looking for a piece without doors. Below are some photos of the piece during the restoration process.

The next two photos are of the top and base as they came into the shop.


The molding which framed the opening in the top was very loose, so it was glued in place, as seen in the photo below.
It is hard to see in these photos, but the interior of the base was very dirty and had many rings on the shelves. The entire interior  was sanded and stained.

One of the shelves was loose and the joint had failed. Below is a photo of it being glued.

Many of the nail holes in the back and shelves were filled and sanded, in preparation for painting the interior of the top.

The drawer bottom was separated, but it was possible to glue the two boards that make up the bottom back together, as seen in the next two photos
 

The last two photos show the piece once the painting was done and the finish was restored. It really turned well and the customer loved it. Thanks to Dwayne and Krista at the Gilded Flea for the great find!


George III Mahogany Chest on Chest (ca. 1770)

$
0
0
The restored chest on chest

This post concerns the restoration of a Mahogany chest on chest I recently restored. The piece is from the British Isles and dates to the second half of the 18th Century. I have a suspicion that the piece may have been made in Ireland or Scotland, but it is safe to say that it was in the style of British manufacture. As far as Chest on Chests are concerned, this was a really nice example that had suffered several bad restorations in its time, but more on that later. The top half of the chest is capped with a cornice containing dental molding above a well executed frieze displaying patterned blind fretwork. Below the cornice the upper half of the chest has two short drawers above three long drawers, each graduating in size by 1 inch. Above the three graduated drawers on the bottom half is a brushing slide (a sliding shelf used to dust garments). Below the lower three drawers are four robust ogee bracket feet. Besides the well executed ornamentation on this chest, the sheer size of it is sure to impress the viewer. This was a chest made to impress and was made for someone who not only had a lot of clothes, but also a lot of money! 

The condition of the chest when it was presented to me was quite bad, with many repairs needed and a complete replacement of the finish. This last part I did not take take lightly, and tried first to remove some of the over finishing that had been done in the past, but once I got to the base finish I realized that it was a Lacquer that had yellowed in the pore of the chest, making it necessary to completly remove the finish and start from scratch. Below is a photo of the top followed by a photo of the bottom half. This is what the piece looked like when it came to my shop.

In this next photo, you can see the wood coming through the darker opaque section of the over finish, It was as if someone has smeared brown paint on the surface of the chest. The yellowish tint beneath the brown smear turned out to be the yellowed Lacquer finish.
This next photo shows the finish being removed, with the bare wood coming through. The following photo shows the same drawer  with the finish removed.

after the finish was removed, the repairs began. One particular repair that happens in a chest like this is that the board which covers over the dovetails for the drawer dividers becomes pushed away from the sides. The photo below shows this and the following photo shows the gap created in detail.

This gap is caused by the sides shrinking over time. There are boards which are laid across the grain inside the chest which guide the drawer as it moves in and out. Since these boards are running perpendicular, they do not shrink, and they push out against the dovetail cover, causing the separation. Below is a photo of one of the problem boards.
The drawer guides were each removed and cut down so that the dovetail covers could be glued back in place. Once they were cut to size they were reattached. This next photo shows the divider between the short drawers being glued.

This photo shows the guides mentioned before trimmed and laid out for reattachment.
To glue the guides in place, short pieces of wood were wedged in place to hold the guides as the glue dried as seen in the photo below.

This photo shows the board which guides the short drawers from moving side to side being glued in place. The process for holding the board while the glue dried was the same.
After all of the close ups, I thought it would be good to offer a shot of all of these repairs being made. The red clamps on the sides are holding the dovetail covers in place as the glue dried.
Similar repairs were made to the bottom case. In addition, the feet on the bottom case needed to be reattached where they had broken. Two sections of the broken feet were missing and needed to be made. To cut the ogee profile on the feet, I used the table saw to create the cove and refined it with chisels. Below are some photos of the cove after it was cut on the table saw.


Using a piece off of another foot, I cut the profile for the foot. The piece I used is seen below
These next two photos show how the feet remnants were still attached to the case. The photo which follows shows all of the broken sections from the feet ready for gluing, including the two portions I made.


These two photos show the portions I made. Further refinement was made to each foot once the pieces were attached.

This photo shows the broken sections of the feet being reattached.
The next two photos show the new sections I made attached to the feet and refined.


The molding which serves as a transition from the lower to the upper chest was all loose. I removed it, removed the old glue, and reattached it. This can be seen in the next two photos

The cornice had several pieces of missing molding and also many loose pieces of dental molding and blind fretwork. I made the missing molding using an existing section and attached the new section. This can be seen in the three photos below. I also attached a board I made to replace the missing back board that completed the fourth side of the cornice.


This photo shows gluing the molding on the opposite side.
There were many feet of dental molding missing from the cornice. To make new molding I found that the thickness of my table saw blade was identical to the kerf in the molding. I used a backer board on a cross cut sled and cut into it to use the kerf as a guide. A piece of the old molding can be seen lying in front of the backer board in the photo below. The kerfs are lined up. The blue tape to the left is set to where the edge of the next kerf is in the molding. by advancing the kerf  I just cut to this blue tape line, I was lined up for the next kerf. The rest of the procedure was pretty mechanical.
This shows my new piece with the initial kerf lined up with the blue tape and ready to cut the next kerf. I should point out that in these photos I have the molding lying on it's side for clarity. The kerfs were cut with the molding standing on edge.
Checking my work!
Once the first side was cut, the molding was flipped and the second set of kerfs were cut between the first. Here is a finished piece of pierced dental molding.

This photo shows the new section along side the old. The new molding is below the old.
A stray photo, this shows a piece of missing beading that was replaced. The beading surrounds the blind fretwork.
Several gluing sessions were necessary to glue all of the loose molding, beading, and fretwork. The next few photos show some of this.


After the cornice was finished, new cockbeading was made for the drawers where it was missing. This photo is a sample of some of the new/loose beading being glued.

One of the drawers was missing a significant portion of the back board. I included this because the patch I made may possibly have been the largest patch I have made to date! The board is seen below, followed by a close up of the damage, and lastly, the gigantic patch.


All of the runners on the drawers were worn and broken. This photo shows the attachment of new wood to the runners on a few of the drawers.

This next photo, another stray, shows a missing runner on the brushing slide being attached.

After all of that, the next two photos show the upper and lower chest repaired and sanded.


Here they are again after they were stained.


One last piece of repair work that was done during the finishing process was to  make and attach new drawer stops for each chest.

These last few photos show the completed chest on chest. Quite a magnificent piece to grace my shop.


Regency Rosewood And Beech Sofa (ca.1820)

$
0
0
The Completed Sofa
A recent piece that I restored was an English sofa made during the Regency period. The sofa was made primarily of Beech and had Brazilian Rosewood veneer inlayed with brass in a process known as Boulle work, named after a French cabinetmaker named Andre Charles Boulle (1642-1732) who specialized in Marquetry and invented the process. The process employed in Boulle work is to layer a sacraficial piece of veneer with a piece of the primary veneer being used and a sheet of contrasting veneer or metal. On top of these layers an image is applied. Using a fine saw, the layers are simultaneously cut through producing a piece of veneer with a positive and negative image as well as a piece of metal or contrasting veneer with a positive and negative image. The image itself is sacrificed in the process and the sacrificial veneer is used to keep the valued veneer from splintering with the force of the saw.  The cabinetmaker is then free to use the veneer as the image and the metal as the groundwork or to use the metal for the image and the veneer for the ground. In fact, pieces can be seen where one image is on the front of the piece and the reverse is on the opposite side. The difference between this and marquetry is that with marquetry, each piece is cut individually to create the image.

During the time when this technique was first developed, examples were seen in silver and tortoise shell. The silver was sometimes also engraved. For most of the 18th century, this practice was out of favor, but it came back into use in the early 19th century in England and can be seen on pieces made during the Regency period. In most of these pieces from the Regency period, brass and Rosewood are used. This is commonly seen in sofas as well as occasional tables and chairs. 

Most of the front facade of the sofa I worked on was covered in Boulle work. Where it was not covered, The primary wood (Beech) was stained and fauxed with India ink to simulate Rosewood. In addition to all of this, the feet were capped with cast brass casters that were extremely ornate and echoed the design of the Boulle work. Below is a photo of the sofa when it entered my shop.    
 The central image on the veneer is seen in the photo below. This was seen in four separate places on the sofa and was probably made all at once. The image is a stylized plant growing around and out of an Urn. The urn is a commonly used symbol in neoclassical furniture forms.

 While walking through a friends garden, I realized that the plant in question was a Poppy plant. Once I looked at the image closely, I could see the seed pod in the center of the image flanked by the serrated leaves. Below is a close up of the seed pod followed by some poppy plants showing their seed pods and serrated leaves.

 
 The piece had some veneer loss as well as some missing brass. In addition to this, the finish was in really rough shape and the joinery in the back and in the feet was loose. One other major problem was that the brass casters had completely seized with corrosion. Below is a close up of one of the casters and the brass inlay held in place with some string.
This photo shows a veneered board that was applied to the skirt of the sofa completely dislodged from the sofa.
The next two photos show some of the brass lifted from the leg.

The many photos that follow show the process of checking for loose veneer or brass, lifting it to clean the old glue beneath it, and clamping it back in place with new hide glue. The hide glue takes about 24 hours to really dry, so there were many clamping sessions that went on for several days.


The photo below shows an area where the brass work was actually missing. The next photo shows that area cleaned of its old glue

On the opposite side of the image was the same piece that was missing in reverse. The piece was lifted so I was able to slide a piece of brass sheet below the original and, using an X-acto knife, trace the image onto the new brass. The image was then cut out and reversed and fit into the area that the brass was missing. The completed image is seen in the last photo. Apologies for the flipped photos in this section, but you get the idea!


This photo shows the brass work and veneer above  being glued in place.
The back of the sofa is a separate frame held in place at the bottom with tenons and at the top with screws. This is to allow the upholsterer to upholster the seat. The joinery on the back of the sofa was very loose. In the photo below you can see the back with each piece marked with blue tape to indicate the orientation and the position of each piece. The back was then disassembled, The glue was cleaned, and the back reassembled. This process is shown below.


Once the repair work was completed, I turned my attention to the finish. The finish was in bad shape and really needed to be stripped. The danger in this was that the Beech wood had been fauxed with India ink and I did not want to loose this. The finish was a shellac based finish and the solvent used was alcohol, so I used alcohol to slowly smooth out the original finish and reverse the damage done to the finish. The result was a finish that was very thin and needed new finish to be added to it. The other result was that the India ink was preserved. One other piece that came out of this was that the finish was removed from the brass and the brass was brightened to contrast the Rosewood. From there it was just a matter of coating the sofa with new finish and waxing it. Here are a few images of  the restored finish before the sofa was sent to the upholsterer.


Below are some photos of the sofa back from the upholsterer. The fabric was gold in color and picked up on the brass quite well. The upholsterer also made Bolster cushions for the sofa, seen in the last photo. The result was a stunning sofa that in my opinion was really worth the effort put into it.


Mahogany Secretery Desk (ca.1930)

$
0
0
The Completed Desk

 A piece I recently restored was a secretary desk made by the Northwestern Cabinet Company of  Burlington, Iowa. I believe the desk to have been made sometime around 1930. The Burlington Public Library has put together a webpage detailing the history of some of the furniture manufacturers of that town. An entry on the history of the Northwestern Cabinet Company can be found here. It is the third entry down:

http://www.burlington.lib.ia.us/genealogy/furniture.htm

In addition, while researching this desk I came across a photo taken recently of the factory. A link to that photo can be found here:

 http://iggyz.com/?p=9695

Below is a page from a catalog of the Northwestern Cabinet Company showing an almost identical desk to the one I worked on. The differences I can see are two more drawers inside the desk compartments as well as a slightly more elongated pediment. The original sale price in the catalog was $47.40.

The desk is referred to in the catalog as a "Governor Winthrop" desk. This is a bit of a misnomer as it was named after Governor John Winthrop of the Massachusetts Bay Colony. Governor Winthrop lived during the 17th century while the design of this desk reflects a mid to late 18th century taste and would most closely be associated with the Chippendale style. Wikipedia shed some light on the origin of this name, saying that it was first coined in 1924 buy the Winthrop Furniture Company of Boston Massachusetts, who offered the "Gov. Winthrop Desk" during the Colonial revival period in American furniture manufacturing. The use of this term dates the desk I worked on to after 1924 and realistically it was probably made in the 1930's, 1940's, or even as late as the 1950's. Below is a photo of the label on the back of the desk. The name of the manufacturer is seen in the bottom right hand corner of the label.
 
The advertisement above mentions that the desk was originally offered in a Walnut or Mahogany finish. Indeed, the primary wood used in this piece is Birch that has been stained and finished to resemble Mahogany. Birch was commonly used in this fashion because when stained, it has a look similar to Mahogany, and was much less expensive to use since it is a domestic wood. Below is a photo of the desk as it came into my shop. One of the drawer fronts had become loose, the feet were loose and missing portions on the claws, the finial was missing a portion, and the finish needed a cleaning and touch up. In addition, the false dividers for the glass were warped badly as was one of the drawer bottoms. One last piece was that the plating on the hardware had come off , revealing the metal sub layer which was pitted and rusted. The owner and I decided to replace the hardware, as seen later in the post.
This photo shows the top drawer front being glued to the rest of the drawer.
The glue block used to support the finial had become loose. This photo shows the piece being reattached to the back side of the pediment.
As stated above, several portions were missing from the "claws" of the feet. This was due to glue failure and the fact that the feet were not solid, but comprised of several boards glued together. Feet get a lot of abuse from vacuums and feet passing by. This photo shows the patches on two of the feet in a semi-carved state. they were later finished and touched up to match the existing finish.
One of the drawer bottoms had become very warped and was beyond repair. I used the original as a template for the new one. In order to do this I had to clamp the old bottom down to the new in several places in order to get an accurate tracing.This is seen in the photo below.
Below is a photo of the new bottom on the right next to the old drawer bottom on the left. You can see the amount that the old bottom had warped. It had also become delaminated.
Below is a photo of the old hardware on the right next to the new hardware on the left. The new hardware was slightly larger and had a more traditional profile than the old. It was also made from solid brass rather than  brass plated metal.
The old hardware was also pressed as seen below to give it the depth of brass hardware. The next photo shows the back of the new hardware that was flat and not pressed. Overall, the new hardware was a nice addition to the piece.

One last photo of the repairs was gluing down the lamination on the dividers for the windows. You can also see in this photo how warped the divider had become. To deal with this, I reversed the dividers when I put them back in to flatten them against the glass. The next two photos show the completed desk.


Cedar Lawn: French Empire Style Pier Table ( Ca.1980)

$
0
0
The Restored Pier Table
 Another piece I have recently restored for the Cedar Lawn estate in Jefferson County, West Virginia is a pier table made in the style of the French Empire period. I dated it's manufacture to 1980, but it is only a guess at its age. While being a reproduction, this is certainly a good one. The hardware was all nicely detailed and cast well. The primary wood used is Mahogany and good Honduran Mahogany was selected for the piece. The top is made of Poplar, pointing towards American manufacture, which was ebonized. Portion of the columns were also ebonized and gilt with a bronzing powder. The term "Ebonized" refers to staining a piece of wood with black stain to mimic the appearance of Ebony. The look is different from painting, in that the grain of the wood is visible through the black stain and once stained the wood is coated with finish the same as the rest of the piece.

The condition of this piece was pretty good overall, but there was significant damage to the finish on the ebonized top and the Mahogany sections had a cracked and tired finish, the gilt and ebonized portions on the base had flaked off revealing the Mahogany wood beneath. Structurally, the table needed little work and it only had minor cosmetic damage. Here is a photo of the table as it came to me.
Before going on, a little history on the Pier table. A pier table is a table usually placed between two windows. I do not think that the form is found much earlier than the early 19th century, and most are made in the style of French Empire. Many pier tables are made with a large mirror set between the two back legs. An interesting myth cropped up surrounding the use of this mirror which is debunked by another blogger here:

http://clermontstatehistoricsite.blogspot.com/2009/12/mythical-mirrors.html

Now back to the restoration. Below is a photo of the table with  the finish removed and the surface sanded and prepped for a new finish.
The first thing I did was to stain the Mahogany portions of the table, as seen in the two photos below. As stated above the top was made from Poplar and appears very light in these photos.

The next two images show the top after it was ebonized.


This last photo shows the completed piece with the hardware attached and ready for delivery.

New York Federal Scroll Back Arm Chair (ca. 1820)

$
0
0
The Completed Chair
A recent restoration project was an arm chair made in New York City circa 1820. This chair was made during the Federal period of American furniture manufacturing which is part of the larger Neoclassical period. This style of chair is known as a scroll back chair and is closely related to the Klismos chair, both taking design elements from classical Greek furniture forms. This particular chair was most likely made by a Scottish Cabinetmaker who immigrated to New York some time in the early 19th century. According to the current owner, the chair was owned by Andrew Mitchell, another Scottish immigrant. The current owner, Mr. Andrew Trotter, provided the following information about Mr. Mitchell:

"This chair is known in my family as the “Mitchell chair,” after Andrew Mitchell (1753-1836), a prominent merchant in New York City. It was passed down in my family along with Mitchell's Bible and other family documents. Andrew Mitchell was born in Gallowayshire, Scotland, and emigrated to New York in his 20s, according to family and official records. In the American War of Independence, he was a Loyalist and served in a militia unit defending the King. He witnessed the Battle of Bunker Hill and later was captured and imprisoned for six months on Long Island, N.Y., but was released and made his way to British-controlled New York."

Mr. Trotter also provided this detail photo from the front cover of Mitchell's Bible:


In researching this chair, I came across a book entitled "Scottish Cabinetmakers in Federal New York" by Mary Ann Apicella. In this book, Ms. Apicella details the wave of Scottish immigrant cabinetmakers who landed on the shores of New York City bringing with them their vernacular interpretations on Neoclassical furniture forms. Once here, these Scottish design elements were quickly incorporated into Federal New York furniture making and the result was a distinguishable sub form of Federal Furniture. Ms. Apicella uses the book to record this history as well as compare Scottish and American furniture forms to help identify and characterize the furniture made by these immigrants.

In the section of her book that deals with chairs, Ms. Apicella points out certain characteristics that were seen on these New York scroll back chairs that point towards their being made by Scottish hands. Most notably among these were the use of a carved central splat. The central splat which sits mid-way up the back of the chair and spans the space between the rear posts, was carved in a variety of motifs, including eagles, cornicopias, and lyres. Often, these chairs were also seen with a carved splat without a main motif, as is the case with the Mitchell chair. Ms. Apicella points out that this was a characteristic that is exclusive to Scottish design. English chairs often had a central carved splat of a twisted rope or often would use Boulle work as ornamentation. For an example of Boulle work, You can view my earlier post on a Regency Sofa here:


Another design element that Ms. Apicella points out as  being Scottish is the way the crest rail is framed with beading. Inside of the beaded frame is a piece of crotch Mahogany veneer. Mr. Mitchell's chair exibits this feature as well. So why is this not a Scottish chair?

The design element I spoke of above evolved from Scottish design elements and particularly the carving of the central splat, while evolving from Scottish design ideas, is more closely related to that of chairs made in New York by Scottish immigrants. The woods used are another clue. The chairs of this sort made in Federal New York were made almost exclusively out of Mahogany. The Mahogany used as a primary wood in this chair is West Indies Mahogany and is very tight grained, making it an excellent wood for carving. Because of it's fine grain and stoutness, fine detail was achieved in the carving and turnings on the chair. In addition to this, the stoutness of the timber made an excellent choice for a chair with curves in its individual components. A more open grained wood would have been less structurally suited to this type of construction and more apt to break along the grain. By selecting this wood, the cabinetmaker was able to provide a functional chair that also met the design expectations of the day.

The secondary wood seen on the front stretcher is American Ash. This wood was used commonly on these chairs as a secondary wood. While it is possible that a chair could have been made in Scotland using these woods, It is far more likely that another wood, like Beech, would have been used as a secondary wood. The use of Laburnum as a primary wood was also commonly seen on chairs of this type in Scotland.

By looking at the overall design, the carving motifs, and the woods used, I believe that this chair was made in Fereral New York, by a Scottish cabinet maker recently landed on American shores. Beyond that, attribution is difficult. One possible way to find attribution would be to make a tracing of the leg pattern and compare it to attributed examples. Perhaps a template was used more than once and a common shape can be found. Regardless of attribution, one thing is certain. This is a finely executed example of a New York federal scroll back chair that was made with great skill and effort. Below are a few photos of the chair as it came to my shop, some detailing the individual components I spoke of earlier, followed by photos of the restoration.

 These first two photos show the chair from different angles. The left arm had been broken off and the joinery in the seat frame had loosened up over time.

 
  These next two photos show the detail of the carved central splat. The design uses carved C-scrolls mixed with foliage. It interesting to speculate that perhaps this chair was made to order, and that Mitchell, being a loyalist in the revolution, would have turned down an eagle or cornucopia motif, both pointing towards the prosperity and strength of the new nation. This is only speculation, but it is a curiosity in light of the chair's history.

 
This photo details the crest rail which displays a piece of crotch Mahogany veneer framed by cock beading. According to Apicella, this design element is a Scottish innovation.
Of added interest were the turned applied discs or buttons that are seen on the termination of the arms and the rear posts. this is lesser seen feature among examples of Federal arm chairs I have viewed, and it certainly completed the design of the chair. The buttons can be seen in the two photos below. The first shows the arm and the second a detail of the rear post.

This photo shows the front seat stretcher. The stretcher is Ash. A piece of molded Mahogany is applied to the front and when the upholstered seat frame is attached, the Ash is concealed. The seat frame for this chair was also made from Ash and appeared to be original, although the upholstery was not.
As stated above, the left arm had broken off of the chair as had the post which supports the arm .In the photo below you can see the mortise in the left seat stretcher. The interior shoulder had broken off with the front post when it broke off.
To ensure proper alignment of all of the broken sections, the gluing was done in stages. In this photo the joinery on the seat and back are being tightened and various small parts are being glued in place.
 
While that was drying the various broken parts were reconnected to the front post, as seen in the photo below.
There were two missing portions that needed to be patched. To do this I used tight grained Honduran Mahogany. The color was different than the dark West Indies Mahogany, but the grain matched nicely, and the color was addressed later by using stain. Below is one of the patches rough carved in place.
On curiosity was the use of a double tenon in the joinery that connects the arm and the front post. Typically, the tenon would be integral to the post and the mortice would be in the arm. In this case, both components had mortises and a double or floating tenon was fashioned. At first I thought this a repair, but upon closer inspection found that the tenon was made from Ash and appeared to be part of the original construction. Why this was done is a mystery. Perhaps the piece used for the post was not quite long enough to include an integral tenon, or perhaps this was done to add strength to the joint. It is hard to say, but seeing as how the arm broke here, I doubt the tenon was added to strengthen the joint! Here is a photo of the floating tenon.
These next two photos were taken during the finishing process, after all of the repairs were made.

These last few photos show the completed restoration of the chair. The original finish was maintained in this restoration and the results were quite nice. The last photo shows the chair fitted with its seat. The seat has a needlepoint that I think will be recovered by the customer at a later date.


Late Classical Mahogany Rocking Chair (ca.1830)

$
0
0
The Completed Rocker

 A recent restoration project involved a Late Classical Mahogany rocker made around 1830. The rocker was stamped with the name "S. Winslow" on the inside of the front seat stretcher. Unfortunately, no other reference to this chairmaker could be found, but most likely, he was working in one of the cultural centers of the eastern seaboard during the early 19th century and produced this rocking chair. Judging by the detail and the mahogany used, I would think that this chair was made in an urban area, and not in the country. Also, the fact that the cabinet maker had a stamp (or signed his work at all) indicated that it came from a shop that was producing a good amount of furniture.

The rocker had several structural problems when it came to me. The right arm post (facing the chair) had fallen off and the joinery was generally loose. The finish was also in rough shape and after some consideration, I decided to remove it. Below are two photos of the rocker as it came to me.

The buttons were pulled on the back of the rocker, but they were very uneven. Generally, this fabric was worn and not original, so the customer and I decided to have it reupholstered as well. The button layout can be seen below.

Once the finish was removed from the chair, I set about the repairs. One quick note, the way this chair was designed, the upholstery was attached to a seat frame and a back frame that once upholstered, would fit into the frame of the chair and be screwed in place. The only fabric that was attached to the chair itself is a piece of fabric on the back side of the back. This covers the work on the back side of the back frame. Once these frames were removed, all that was left was the chair frame. In disassembling the chair, the crest rail fell off as well. This had been repaired previously several times and need to be glued in place. Below is a photo of the chair frame with the crest rail and arm removed for re-gluing.
This next photo shows the chair frame assembled and sanded, ready to be stained and finished. The following photo shows the chair after it was stained.

 
This last photo shows the completed chair with the new upholstery. The buttons were pulled on the back but this time they were placed a little more evenly!


Oak Bobbin Cabinet (ca.1920)

$
0
0
The Completed Cabinet
Recently I worked on a piece that is a bit of a mystery. It is an Oak cabinet that was made sometime in the early part of the 20th century. The cabinet has a large door that opens to reveal six drawers. The drawers all had bottoms that had holes drilled in them every three or four inches in a grid pattern. There is also a shadow of some pieces that cris-cross the holes in a x-pattern. The owner of the cabinet thought it might have something to do with an old record player, like a Victrola. The thing that first came to my mind when I saw it was that the holes had dowels in them at one time and that these dowels received bobbins of thread that were not in use. If this were true than the bobbins would have to have been pretty large in diameter and height and also the cabinet would have had the capacity to store many bobbins. If it was used for this purpose, it was likely used in a commercial setting. 

All of that being said, I really have no idea what this cabinet was initially used for. The cabinet was made from Oak and portions of the case were veneered with book matched panels of  Quarter Sawn Oak with a very pronounced grain pattern. If it was used in a commercial setting, I wonder why the manufacturer made it look so good?

The cabinet was in pretty rough shape when I received it. The finish was cracked and the top was marred with scratches and rings. In addition, the cabinet was missing a portion of the bottom of the case as well as two feet (one a carved lions foot) and it was also missing a drawer. Below are some photos of the restoration of this mysterious Oak cabinet. 

The first thing I did was to remove the finish from the cabinet. Once that was done I set about the repairs and also making the drawer and the missing feet. To make the drawer, I disassembled an original drawer so that I could make copies of each individual component. The photo below shows the drawer disassembled. The blue tape shows me the orientation of each board for reassembly.


The front edges of the two side boards were dovetailed into the front of the drawer using a half blind dovetail. This means that the ends of the dovetails on the sides are concealed by the front of the drawer. These original dovetails wer produced by machine and so I faithfully reproduced the originals using my router. To do this I built a cross cut sled for my router that allowed me to move the edge of a board across a moving bit. I then set up the router in the table with a dovetail bit and cut my dovetails. Below is a close up of this operation folllowed by a shot taken from further back.

I used a similar procedure to cut the mortices for the dovetail pins into the board that would be the front of the drawer. Here is a close up of the completed dovetail on one side of the drawer.
This photo shows the new drawer constructed minus the bottom.
This photo ( a little out of sequence) shows the new drawer sides beside one of the sides I had copied.
The next two photos show the completed drawer with the bottom. The bottoms of the original drawers were plywood that was nailed onto the bottoms of boards. I kept with this design when I made my drawer.

This last photo shows the new drawer on the left being glued next to the one I disassembled. I glued them on the table saw to ensure that they were flat.
To make the missing feet, I first had to glue up some Oak to create a block large enough to accommodate the size of the feet. Once again, this was done on the original cabinet instead of using a thick stock of Oak. The next two photos show the blocks being glued up.


 To create  the carved foot, I traced the profile of the original (seen above in the photo below) and cut two sides of the block. The block is seen after the cuts were made in the photo below.
Using double sided tape, I then reassembled the block and cut the adjacent sides. After those cuts were made. I removed the unwanted sections, as well as the tape. The photo below shows the double sided tape on the piece to the right.
The photo below shows the sawn block roughed out to the shape of the original foot. I then carved the detail of the toes by hand. One quick side note: When carving with an extremely sharp gouge on tough White Oak, try not to point the gouge towards your hand. I slipped and it went straight into the inside of my knuckle! That meant a trip to the ER and two stitches. Oh well, It happens to the best of us, but I am happy to say that the finger has healed and I am currently typing with it!!


Jumping ahead in time, This photo shows the assembled cabinet with all of the feet and the new drawer in place, ready to be stained.
The last few photos show the completed cabinet. The new drawer is on the bottom in these photos.


Sawstop Saves a Finger!

$
0
0
My New Table Saw
 In keeping with the theme of my last post, I thought it would be appropriate to unveil my new saw, purchased just at the end of 2012. It is a SawStop professional cabinet saw. This saw works beautifully and is very accurate, and it can handle large sheet goods and fine adjustments. I have been looking at purchasing a nice saw for a couple of years and my wife and friends convinced me to pay over twice the price of the saw I was looking at and buy a SawStop.


The key feature of the SawStop is that the saw can sense conductivity in a material and when it hits a material with a higher conductivity than wood, an aluminum brake launches into the blade causing it to instantly stop its rotation. In addition, the inertia of the spinning blade being stopped forces the blade down into the table. This all happens in a fraction of a second. This is especially helpful when your finger comes into contact with the blade. Rather than losing a finger, you walk away with a scratch! Here is a video from you tube demonstrating how the saw works (they use a Hot Dog instead of a finger in the video!:


Anyhow, thanks for all of your concern about my gouge accident! Here are a few photo of the sparkling new saw!

 The saw on the left is my old Craftsman saw ca. 1970. A real trooper, but hard to adjust and very small next to the new saw. I have finally retired it after 10 years of service!

Late Classical Mahogany Chest of Drawers (ca. 1830)

$
0
0
The Completed Chest of Drawers
A recent restoration project was a chest of drawers from the Late Classical period of American Furniture. I say in the title that the piece was made of Mahogany, but in truth there were several other woods used both in primary and secondary settings. The entire front facade of the piece is made up of Mahogany and all of the other woods used in the manufacture of this piece play a supporting role. Before delving into the woods used, it would be useful to pin this chest to a specific time period to see how it plays a role in the evolution of style from Federal New York to American Empire and the larger  Late Classical period. 

In researching a piece, I often ask the customer what they know about the piece. In this case the customers indicated that the piece was bought in New York some years ago. While pieces can move around a lot, I decided to look at other examples of chest of drawers from this period that are known to have been made in New York. Many pieces exhibited carved columns and similar drawer configurations. Upon further research, I looked at a book I have on Scottish cabinetmakers in Federal New York. The book is entitled "Scottish Cabinetmakers in Federal New York" and is written by Mary Ann Apicella. I referenced this book before in researching a Federal arm chair and have found it a good source of information on a variety of furniture forms. In her section on chest of drawers, Ms. Apicella takes a look at the styles of chests that emerged in early 19th century New York and cross references those styles with English and Scottish examples from the same period in an attempt to isolate the design elements that are unique to Scottish cabinet making. She speaks of the emergence of a wide frieze above the top set of drawers in English 19th century chests. This frieze was purely decorative and was typically veneered or sometimes fluted. Scottish examples have short glove drawers set into this frieze. According to Apicella, This is unique to Scottish chests.

American examples in Federal New York made by Scottish Cabinetmakers exhibited this same drawer configuration and also placed the deepest drawer above the other drawers. This deep drawer was often decorated with crossbanded veneers or oval inlays in the drawer front. A piece attributed to Richard Allison ( a contemporary of Duncan Phyfe and a Scottish New York Cabinetmaker) can be seen in this link:


The piece in the link has many similarities to the chest I worked on. That being said, there are many notable differences. In terms of design, The piece I worked on has as much to do with later examples of an American Empire chest as it does with the earlier Federal example. To illustrate this, here is a link to a later American Empire Chest of Drawers:


In this example, The top set of short drawers are entirely missing and the long deep drawer is on top. One point of interest is that the drawers below the top drawer are inset between the columns. The same is true of the example I worked on except all of the long drawers are inset between the columns and only the two short drawers are overhanging.

It is my opinion that this chest has one foot in each period and in it is seen a transition in design from the late Federal to the late Classical or American Empire. The other indicator of this is that the side construction on this chest is solid, where later examples (after 1840) show a frame and panel construction, as seen in the second link. This adoption of the frame and panel construction was to reduce the risk of the sides cracking, because the large panel is floating in the frame and is free to expand or contract. The solid side is fixed at its outer edges and as it expands and contracts the side cracks down the middle. The chest in question suffered from this fate many years ago and Mahogany wedges were glued in place to fill the crack.

Now that that is cleared up, onto the specifics! The chest was made primarily of Poplar and Cherry. The poplar was used exclusively as a secondary wood in  the case construction. The Cherry was used for the top and sides and the upper edges of the drawer fronts. This is typical of pieces from this time as decent Mahogany was expensive and often hard to come by in wide widths. Cherry, sometimes called the "poor man's Mahogany" was often substituted and stained to match the Mahogany sections. 

The front of the chest was veneered with a West Indies Mahogany, probably from Cuba or the Dominican Republic. The columns and the knobs were made from Honduran Mahogany, which was typically used for these purposes due to its availability in wider widths. Other stray woods used in the piece were Pine in the case construction and Oak for the interior drawer slides. The columns and feet were both highly carved, the columns with Acanthus Leaf and spiral reeding and the bun feet were also reeded. The inclusion of these well carved elements points towards a city center, such as New York City, as a place of manufacture, but it is difficult to say. Perhaps this was made by a Scottish Cabinetmaker in New york later in his career. One other element that would pont towards a Scottish or English hand were the atypical small pins in the dove tail construction on the drawers. American Dovetail pins are usually wider than their British counterparts. The inclusion of these small pins in an American chest may point towards an immigrant cabinetmaker. There are many clues, but just as many questions!

The condition of the chest was pretty good when it came to me, but the majority of the finish had been ruined with repeated application of Linseed oil. This caused the finish to crack and soften. The exception to this was the carved elements, which were in much better shape. Because of this I decided to remove the finish from the top, sides, and drawer fronts and leave the carved elements with the existing finish. This allowed me to also remove some black rings on the top of the chest and repair loose and missing veneer. Below are some photos of the restoration process.

These first few photos show some repairs. The first photo shows veneer being glued down and patched. The following photo shows one of the feet removed which was later glued back in place. The third photo shows more veneer repair.


This photo shows veneer repair done to the large crosbanded drawer as well as a repair to one of the short drawers.
This photo shows the chest repaired and with all of the repairs in place. You can see that I manitained the existing finish on the carved portions of the chest.

These next two photos show the side construction from the inside of the chest. There were metal brackets which spanned the cracks in the sides. These were put in during a previous restoration in an attempt to stabilize the cracking sides. I figured that they did more good than harm, so I decided to leave them. The second photo shows how the drawer supports were dovetailed into vertical stiles which supported the carvings in the front and acted as legs in the back of the chest.


The next two photos show the chest during the finishing process.


These last few photos show the completed chest of drawers.


Steamer Trunk (ca. 1908)

$
0
0

The Restored Steamer Trunk

A recent project to come through the shop was the restoration of an old steamer trunk.The customer who owned the piece said it has passed down through her family and that she would like to have it restored. Not much is known about this trunk except that the lock that was on the trunk said "The H&A Lock Company Patented December 10th 1907" around the keyhole. There were no indications that this lock was a replacement so I assume it to be the original. If that is true then the trunk would have to have been made after that date and was probably made at the earliest sometime in 1908. 

The trunk was made of pine that was covered in canvas or linen and tin. The wood slats that are mounted to the surface appeared to be made of Chestnut. The trunk was also adorned with leather straps and handles as well as a lock and fasteners, making it quite a chore to open and close the trunk, and also making it hard for the contents to unintentionally escape!

The condition of the trunk as it came to me was pretty bad. The exterior straps and handles had rotted and were largely missing. There were also significant portions of the canvas missing from the top. The interior of the trunk, which had been papered was torn and brittle, and also smelled of mildew. In essence, this trunk really needed some help! That being said, the damage was reversible and the customer and I decided to go ahead with the project. Below are a few photos of the trunk as it came into the shop.

The front
 The back.
 
The top.
Missing handles from the sides.

The interior with the rotted paper lining.


This photo is of the inner tray which was also papered.
After removing the paper from the interior and removing the finish from the Chestnut slats, the entire trunk was masked with newspaper with the exception of the portions that were covered in tin, which was originally painted black. The Photos below shows this part of the project

After it was masked, The tin portions were painted with Rust inhibiting black spray paint. This quickly brought the black look back to these sections. After the paint had dried the paper was carefully removed.

These next few photos show the interior after it was sanded. After the interior was sanded it was painted with Kilz primer. This is not standard procedure for me, but I thought it was a good idea to try to contain the mildew smell in the interior.


After the paint had dried on the interior, the new paper was applied to the entire interior and the tray. Below are some photos of the interior after the paper was applied.


The exterior of the trunk was finished with shellac to bring back the nice brown color of the canvas. The lock was also replaced due to the fact that someone had broken the original trying to open it. The leather straps and handled were also replaced. Here are a few photos of the completed trunk.


At the end I included two photos of the old lock which was kept with the trunk as part of its history.


Reclaimed Pine and Natural Edge Ash Cabinet (2013)

$
0
0

The Completed Cabinet

Sometime in 2012, I was approached by the advisory board of the the Franklin Park Arts Center, located in Round Hill, Virginia,  to build a cabinet to fill a corner in the reception room/gallery that leads to the main auditorium in the theater. The cabinet was to be designed and installed as part of a donor wall, which would display a large ceramic tile tree, made by local ceramics artist, Joan Gardiner. Beneath the spreading arms of the tree would be a list of names of people who donated to make Franklin Park Arts Center a reality. My job was to build a complementary cabinet that would tie in to the tree theme as well as the exposed post and beam architecture displayed in the reception room. Below is a photo of the wall slated to be the donor wall (the wall to the left of the corner beam). The cabinet was to fit into the corner and occupy the space between the door to the theater (to the right side of the photo)  and where the tree would one day be (to the left of the large vertical pipe).

The advisory board member who had initially approached me about the job asked that the cabinet have a live or natural edge top and that the vertical surfaces be made from reclaimed barn boards. She also specified that the cabinet be free of visible hardware and instead utilize European style cabinet hinges that spring open when the door is pushed.

Using SketchUp, I designed the basic structure of the cabinet, taking into account the pipe and the vertical beam I was going to have to build around. I then applied a surface with a natural edge top and barn boards for the vertical surfaces. I envisioned this as being a gray face board like oak and thought I would probably have to stain the top surface to match. The original design also incorporated a longer cabinet on the left that would completely surround the pipe. Here are a few photos taken in SketchUp. First are a few images of the cabinet construction followed by some photos of the proposed cabinet with the siding. Each is displayed from several angles.

The cabinet's internal structure.


The proposed cabinet with a natural edge top and barn board siding.


After the project was approved, a couple of changes were made. The pipe was going to be surrounded in wood so that it would not be seen at all. Also, The cabinet would be built into this surround and incorporate it into the design. this shortened the length of the left hand cabinet so that it stopped just past the location of the pipe. Other then those details, the project was on!

My first duty was to source the materials I would need. As far as the top was concerned, Ash was selected and bought from my friend Rick Herbine (http://www.herbinehardwood.com/). The material used to make the vertical sides came from Cochran's Lumber in Berryville, Va. (http://www.cochranslumber.com/). Thanks to both of those organizations for providing fine material to work with. Below is a photo of the lumber stack that the barn boards used for the vertical surfaces came from.
On to the construction. The cabinet had a skeletal structure that was made from plywood and 1 x 4 material. Making the cabinet in this way allowed me to fit the cabinets to the space by cutting the plywood. Once everything fit well, I could add all of the exterior faces to the cabinets in my shop and then install the cabinets in the Arts Center. This was the plan and it more or less worked!

Below is a photo of the base of the cabinet that sits between the post and the door to the theater. It is followed by the same base upside down.

This photo shows a variety of found items providing the height of the cabinet while I cut the top pieces of plywood to fit.
The photo below shows the two bases fit together.
After all of the fitting was done and the 1x 4 braces were put in place, the cabinets were temporarily put together and the barn boards were attached. In the photo below the left cabinet is done and the right cabinet is being worked on.
Now for the top! Below is a photo of the three Ash boards chosen for the top. Two were used. I needed to glue them up to create a wide enough surface so I decided to book match the boards to take advantage of the beautiful grain. The two boards on the right are book matched.
After they were cut to length, I glued the boards together. I used tie down straps to do this so that I would not damage the natural edge (The edge that is facing in the photos below).

This photo shows the cabinet with the vertical surfaces and the doors complete... or almost complete. A decision was made to replace some of the darker boards to give it a more even appearance. The following photo shoes the cabinet with the new boards in place and the Ash top in place.

This photo was taken of the cabinets installed and the top being finished with a satin varnish. To the right you can see the wood surround for the pipe.
After the finish had cured, The blue tape was removed and trim was put around the top. Below are a few photos of the completed cabinet. A special thanks to Joan Gardiner, Shirley Lyle Volberg, and The staff of Franklin Park Arts Center. This was a fun project and I am glad to have been a part of it.


Biedermeier Secretaire a Abattant (ca.1820)

$
0
0

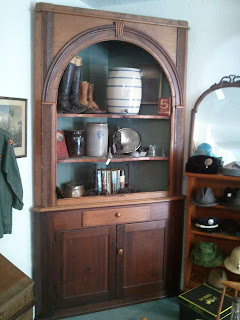
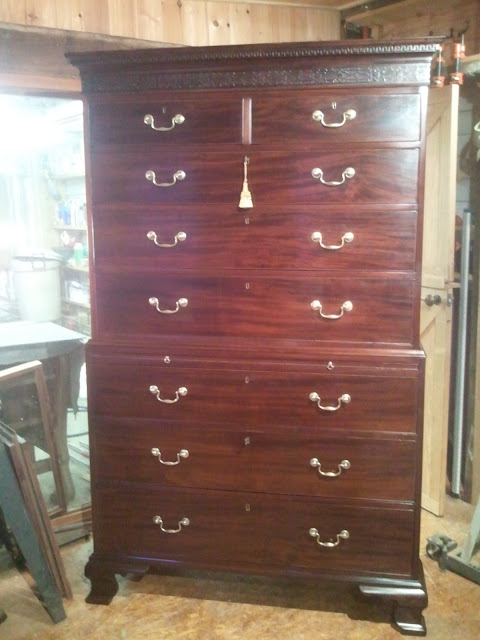
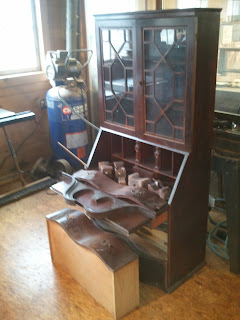
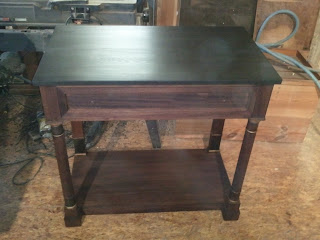
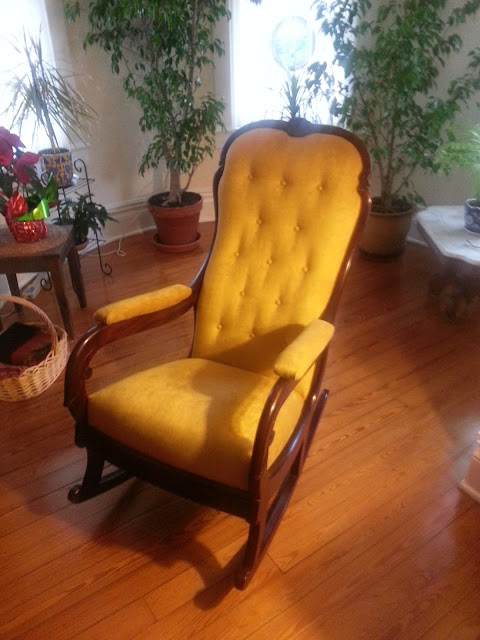
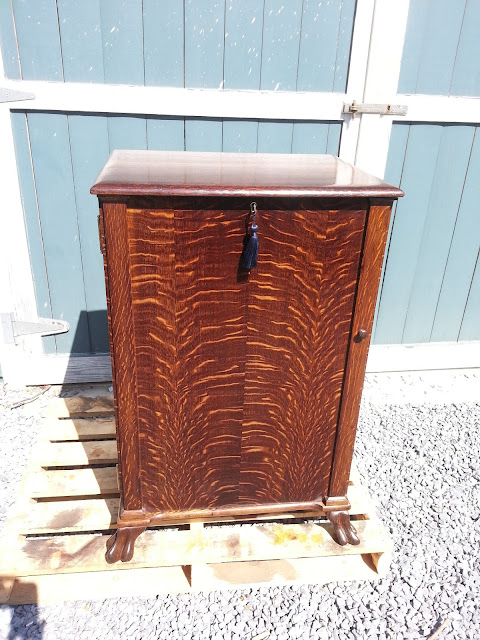
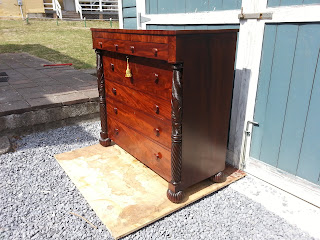
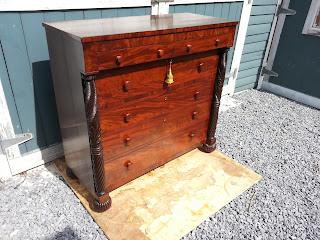
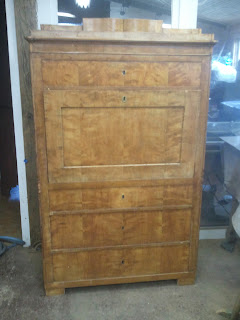
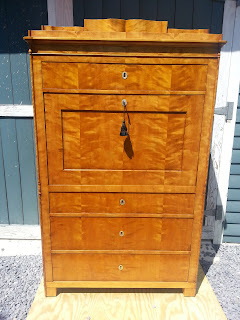
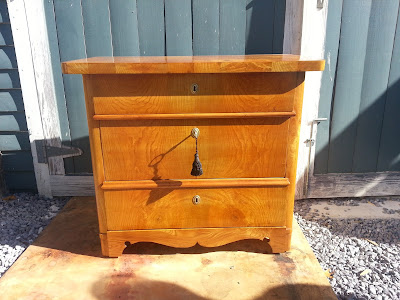
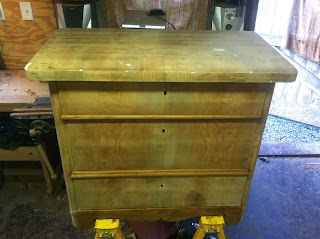
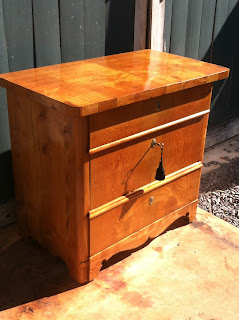
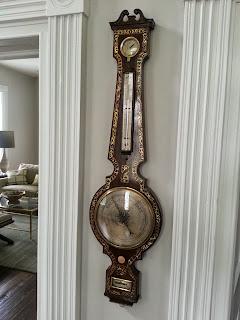
The Completed Secretary Desk

A recent project in the shop was the restoration of a Biedermeier Secretaire a Abattant, or Biedermeier secretary desk. The name sounds a little confusing, since the first word is German followed by French( and none of this in English!) The reason I chose to start of this way is to point out that while the piece comes from Germany or Austria, in a style is known as Biedermeier, The form of the Secretaire a Abattant (literally Flap Secretary) originated in France. This form is not only seen in 19th century French Furnishings, but also in English, German, and American. The American name for this form is a fall front desk or a drop front desk.

The spread of this form to the various countries occurred during the early part of the 19th century in what is known as the Empire period in France. As these designs were taken in by the cabinetmakers of the various countries, the form was incorporated and vernacular designs using local woods were created. This was the case in northern Europe as well as in America, where the style is known as American Empire, or Late Classical.

In northern Europe, the style came to be known as Biedermeier. The Biedermeier period refers to the time period between the Congress of Vienna in 1815 and the Revolution of Germany in 1848. This time saw the rise of the middle class in Germany and Austria and with it a demand for furnishings that were contemporary, stylish, and affordable. A style that, like other neoclassical forms was new and independent of  the furnishings that came before.

the name "Biedermeier" comes form an amalgamation of two satirical characters from poetry by Josef Viktor von Scheffel. Their names were Biedermann and Bummelmaier. The publisher Ludwig Eichrodt combined the names to make "Biedermaier" and later "Beidermeier". This name later came to characterize the art and furnishings centered in Germany during the first half of the 19th century. It is important to recognize this as an independent style, and not simply a sub-genre of  the French Empire. Once investigated, it is clear to see that Beidermeier is a distinct style with unique characteristics and fundamental differences from the earlier Empire style.

After looking at many examples of Biedermeier secretary desks, I believe that this particular desk originated in Austria. The closest examples that I could find which echoed the style and ornamental features of this piece seem to have come from Austria. That being said, I saw many examples that while differing in design, used similar woods.These examples seemed to hail from Northern Germany.

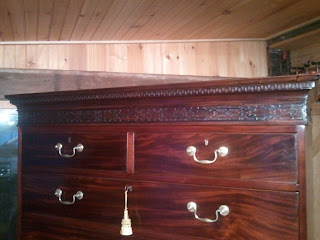
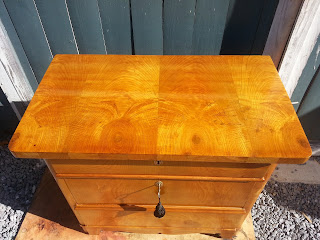
One of the hardest parts of identifying the origin of these pieces is that there is an enormous variety of designs and design elements employed in the making of these desks. A quick search of Google images for Biedermeier desks will show what I mean! One of the reasons for this diversity in design was that these desks served as a signature piece for cabinetmakers and they would put all they had into their design and construction. This is because the Secretaire figured prominently into the German household. It served as a place to store and lock valuables but also as an imposing statement in the decoration of the room. In most cases, this would be the largest piece in the room, if not the household. To add to that, the tiered top of the desk was used as a place to display busts or flowers. In short, this was a piece that was made to be seen and the cabinetmaker used this fact as a way of displaying his craft. 

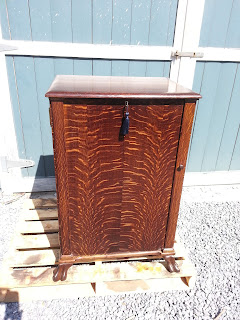
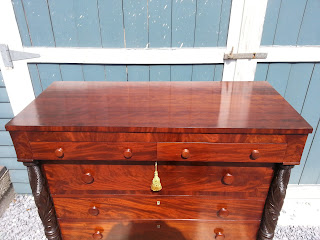
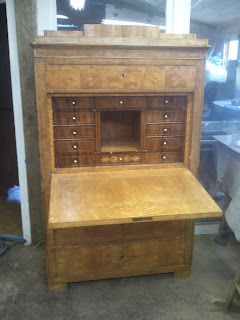
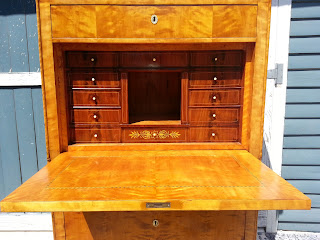
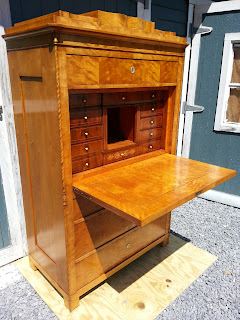
Now to the desk itself. The outer surfaces of the desk are veneered entirely out of flame Birch which was arranged in repeating bookmatched patterns. The edges of the front of the desk had a 3/4 column of turned flame Birch attached from top to bottom.

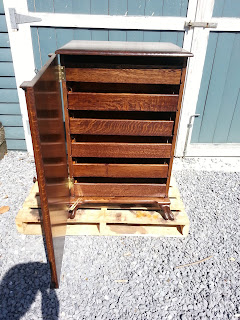
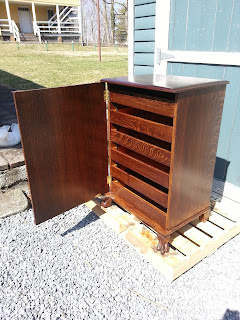
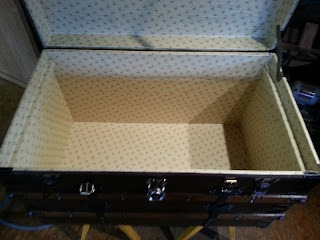
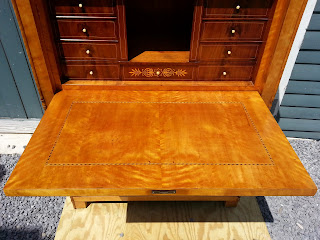
The desk was arranged with one long drawer at the top. Beneath this was the drop front which serves as a door as well as a writing surface. The interior of this large compartment houses several smaller drawers which are veneered with crotch Mahogany. The pulls on all of these drawers are turned Ivory.

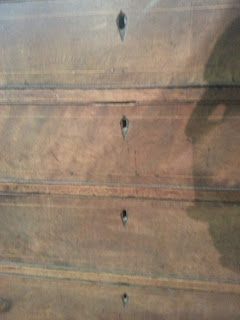
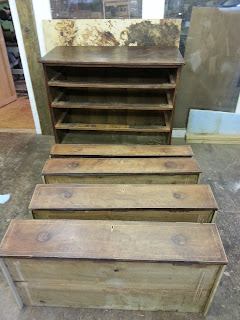
Beneath the desk compartment are three additional long drawers, which are graduated. An interesting feature of these desks is that while the drawers are graduated, they are mixed and do not have an order, like smallest at the top and deepest at the bottom. What purpose this may have served is a mystery to me, but perhaps it was a style feature. It seems to be fairly consistent in Biedermeier desks.

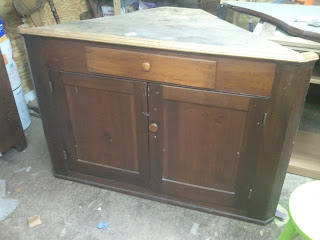
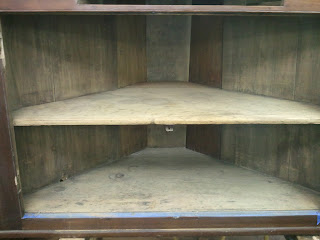
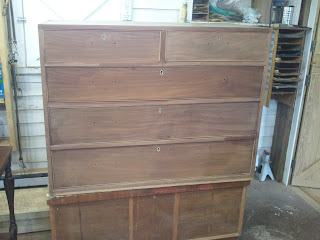
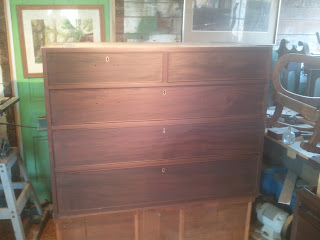
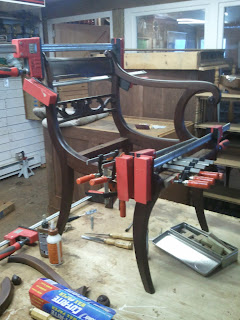
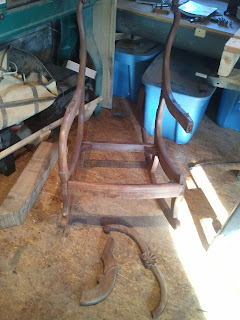
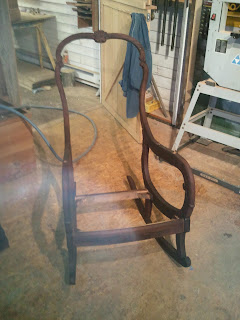
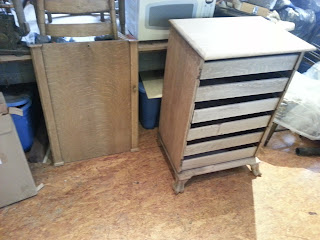
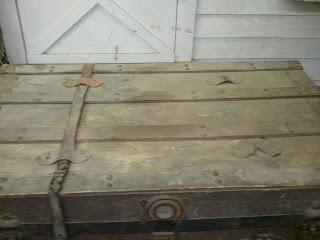
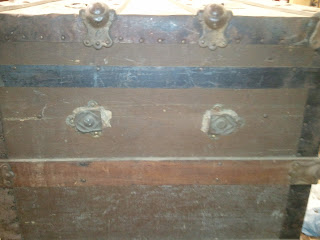
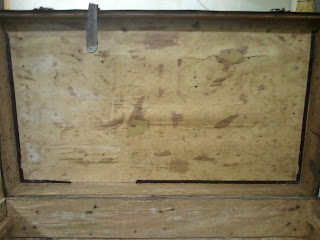
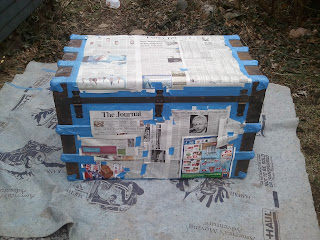
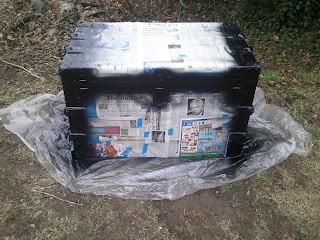
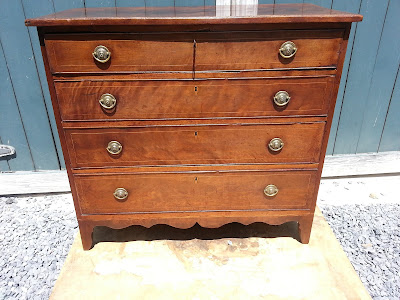
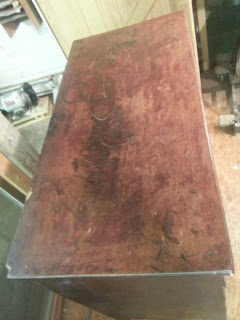
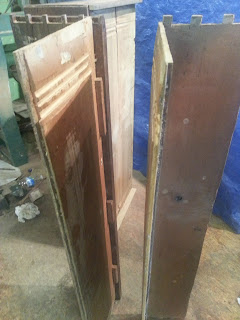
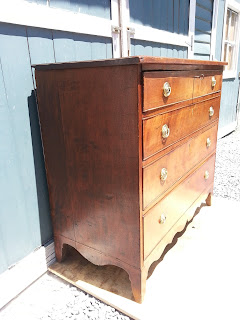
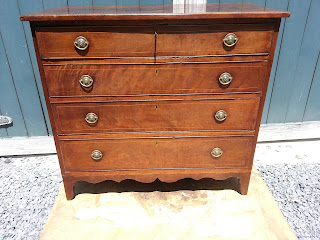
The desk was beautifully constructed using tight hand cut joinery. The secondary wood that the case was made of is Pine and the piece shows no sign of having been made with machinery. Below are a few photos of the desk as it came to the shop.


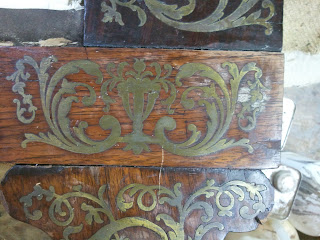
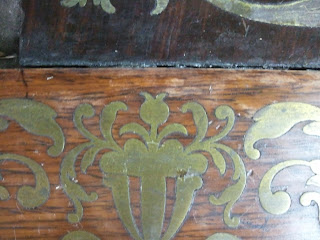
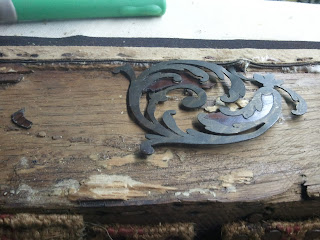
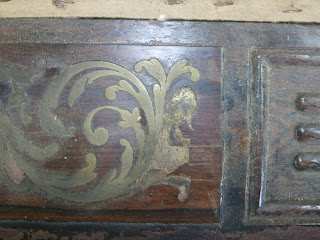
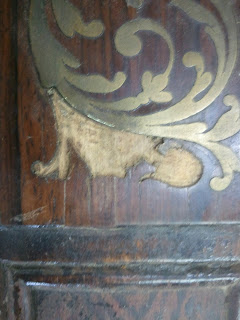
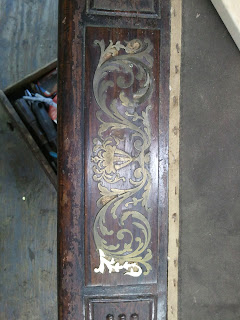
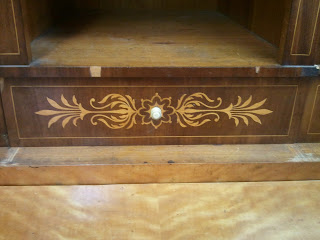
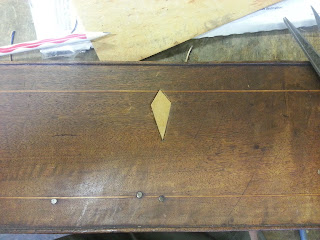
The lower central drawer displays Boulle work inlay in a contrasting wood, perhaps Birch or Maple.
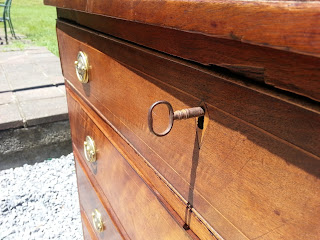
The piece had a long list of repairs that were necessary. This included a new finish, lots of veneer repair, Replacement of the inappropriate feet, repairing the desk lid so it opened and closed properly, and repairing the drawers and the drawer locks. In essence, this piece needed a bit of everything!

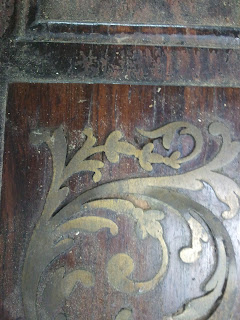
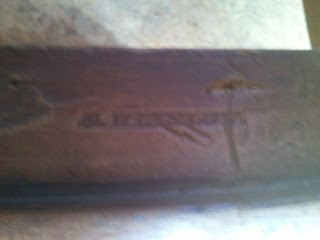
Before getting into the repairs, I will share what we did discover about the desk while working on it. The desk was signed by the cabinetmaker, whose last name was MÜLLER. The handwriting of this signature matches the numbers written on the underside of the compartment drawers. This appears to be the earliest handwritting on the piece. Below is a photo of the signature.
In addition, the piece was signed a second time, this time by a restorer. Julius (or Julian) Martell signed the piece in 1924. His inscription reads that the piece was lightly sanded and fully polished. It then lists the street address, presumably of his shop, in Wilmersdorf, a district of Berlin.  Below is a photo of this signature. Many thanks to my neighbor who helped decipher and translate this writing.
On the back of the case is a label for a moving company named Bergemann & Co. On the label is printed 192_. as well as the name Halensee, which is a district within the larger Wilmersdorf district. Here is a a photo of that label.
From all of this it can be said that the piece was made by the cabinetmaker Müller, perhaps in Austria sometime around 1820. A century later, the desk was moved to Halensee, in Berlin, where it was restored by the Cabinetmaker Martell. There was evidence of work on the case that would support this theory. This may include the innapropriate feet, but those were fastened on by common nails which looked modern. They were probably put on by a subsequent restoration.

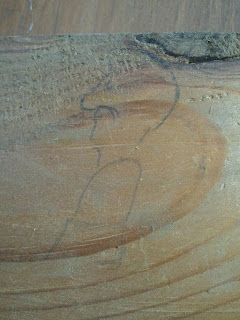
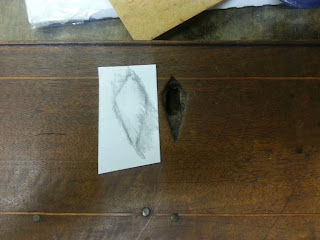
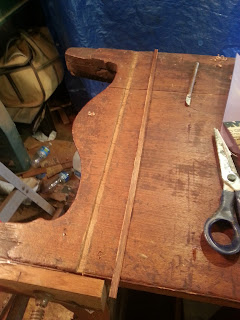
One other find was this wonderful drawing on one of the supports for the compartment drawers. Perhaps this is a self portrait of Müller or Martell. Whoever drew it, it was a happy discovery indeed!
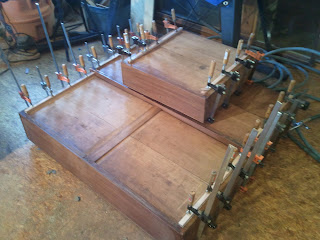
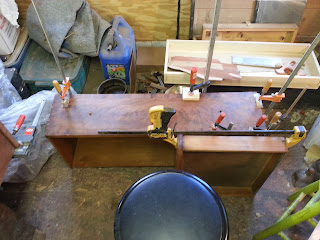
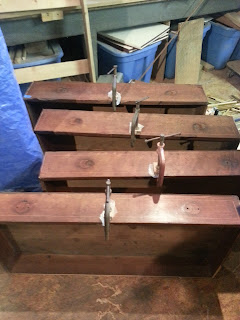
Below are photos of the drawers in various stages of repair. This includes gluing and replacement of veneer, as well as the addition of material to the drawer sides so that the drawers worked well.


This photo shows a repair to the desk lid. It also shows the nice stringing that was inlayed into the writing surface. There were some imperfections in this stringing that led me to believe that it was made by Müller, and not purchased by a stinging maker, who would have had  a more consistent product. This is only a theory, and I could be wrong since the act of making stringing is very time consuming and was often purchased by from a specialist.
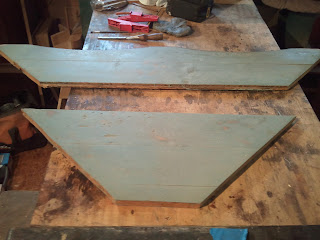
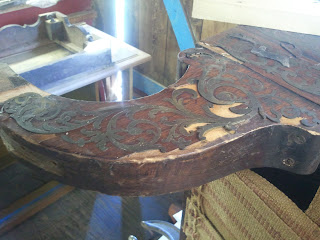
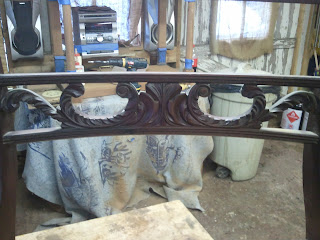
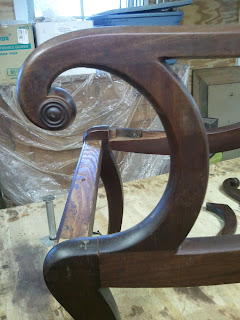
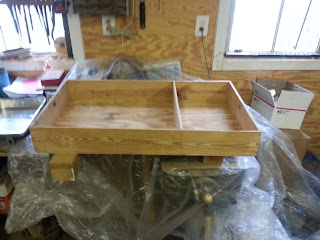
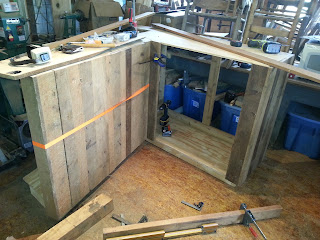
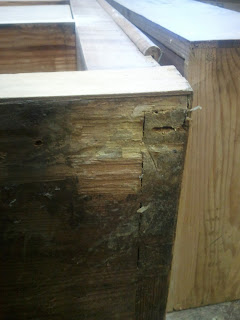
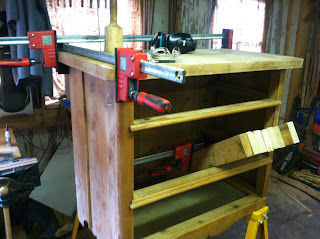
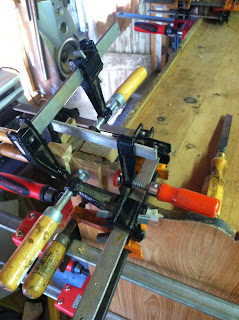
This photo shows various repairs being made to the top corner of the desk. The top tiers have been removed in this photo because they were loose and also warped.
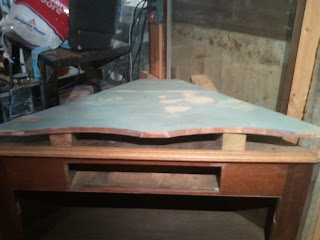
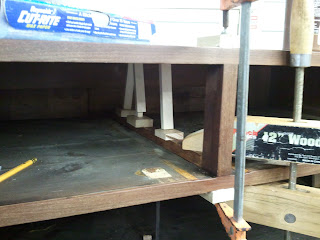
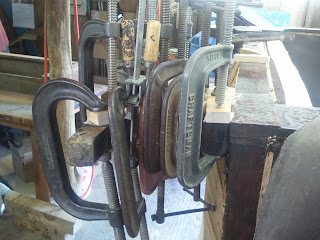
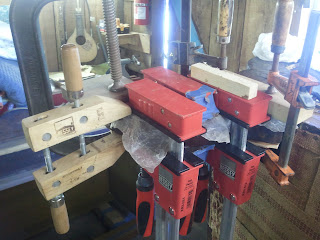
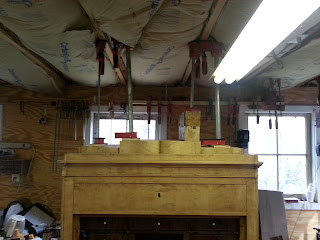
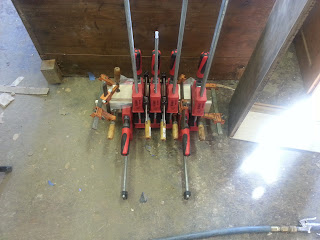
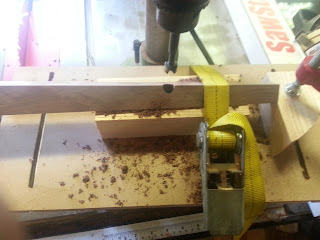
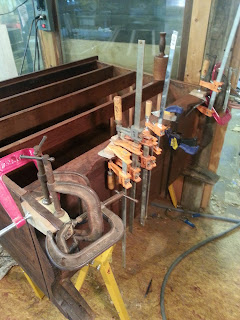
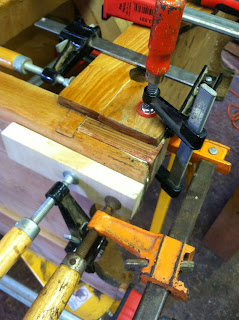
This next photo shows the tiers being attached. We used the old trick of pushing against the rafters to clamp them in place while the glue set. Don't try this at home!
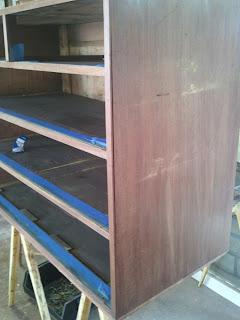
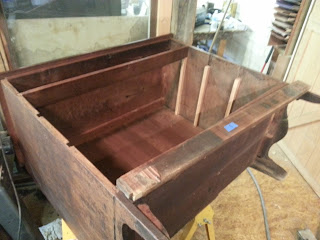
 This photo shows the inner drawer compartment being repaired. The entire compartment was removable which led us to the discovery of the drawing of the little man.
 This photo shows the interior drawers being repaired.
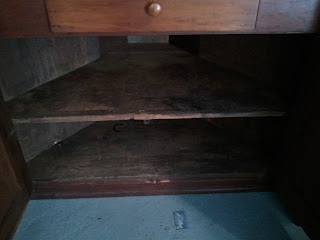
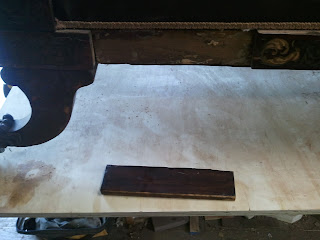
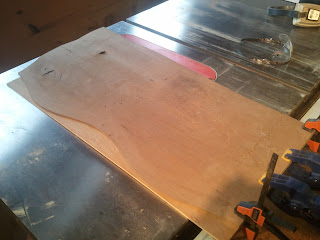
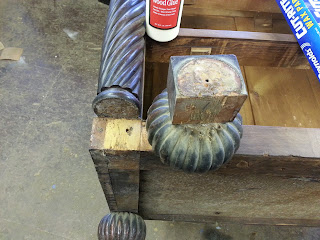
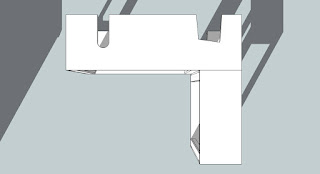
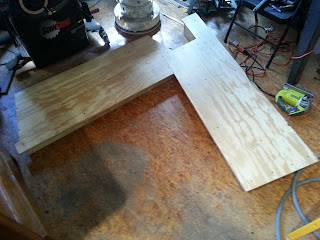
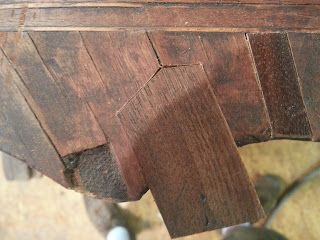
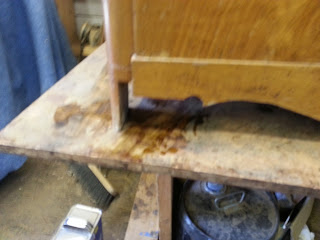
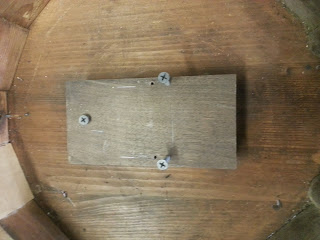
 Once the old feet were removed from the case, the foot print of the originals was visible as a square. I measured this footprint and based the design for the new feet on this measurement. The footprint can be seen here.
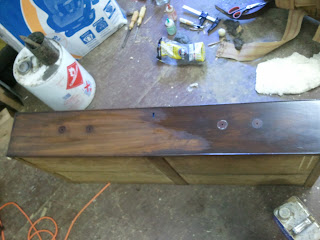
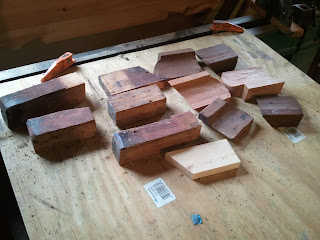
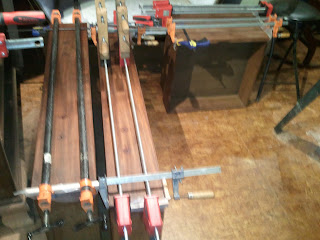
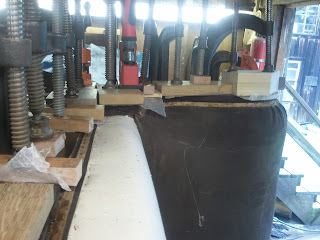
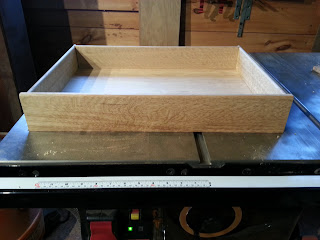
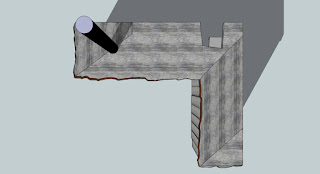
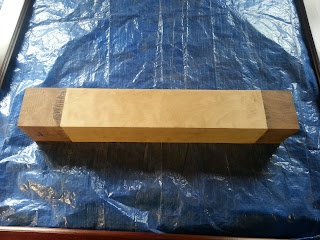
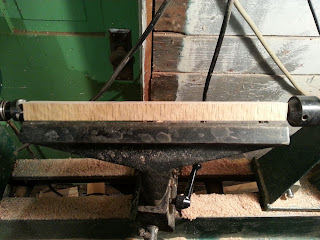
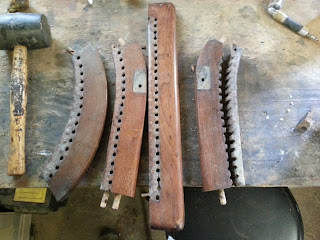
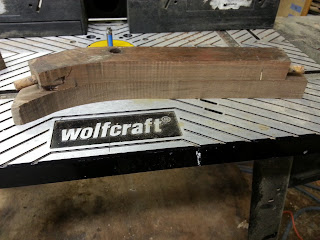
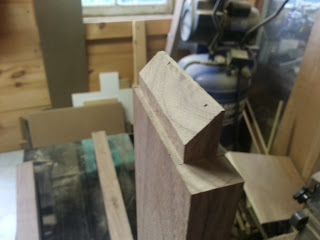
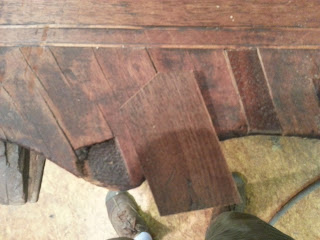
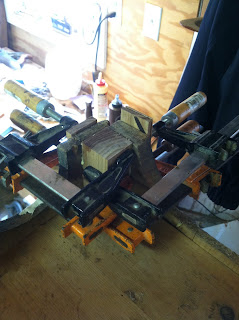
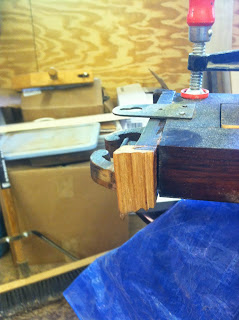
The feet that were on the desk were rectangular and the grain was oriented perpendicular to the grain of the veneer on the case. The feet were also made from solid Beech. All of this is inappropriate to the piece. After looking at many other examples, I decided that an appropriate foot would follow the outline of the original and be veneered in flame Birch, like the rest of the cabinet. In addition, the 3/4 column turnings that run the length of the cabinet would be continued to the termination of the feet. This would bring the feet in line with the rest of the piece. Below is a photo of the block that was used for the feet being veneered. In the lower left of the cabinet you can see one of the old feet.
This photo shows the block after it was veneered.
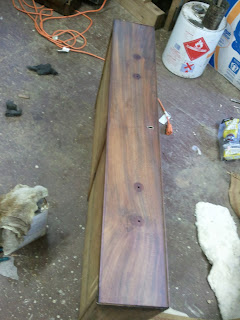
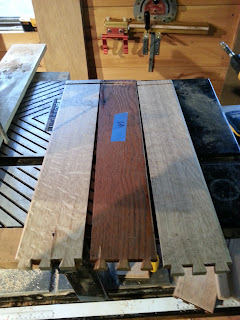
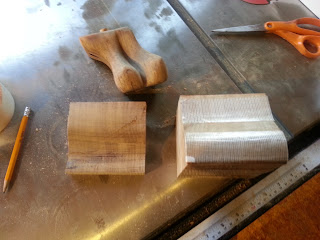
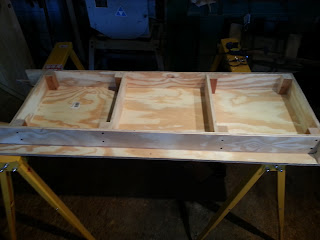
The block was then cut into four feet, as seen below.
 
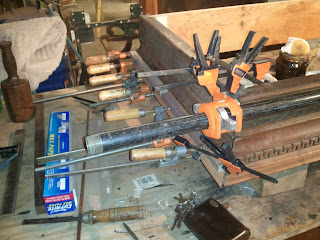
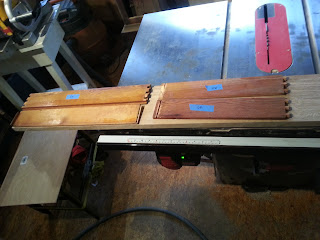
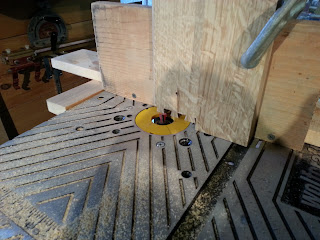
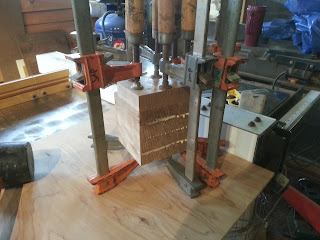
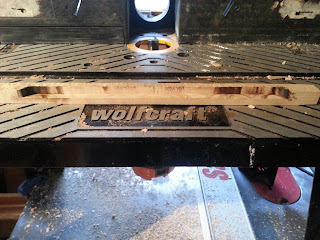
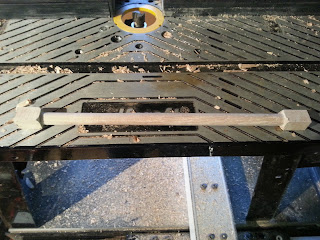
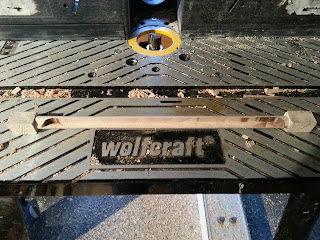
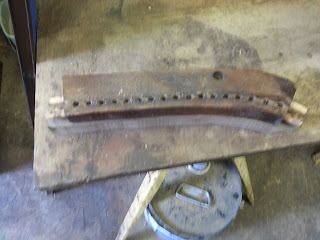
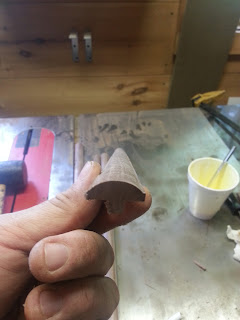
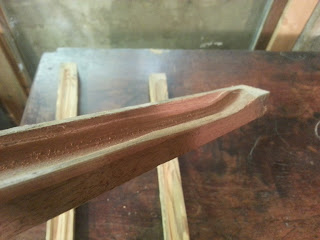
To make the 3/4 columns, I used a router to first cut the joinery for the column and then turned the cut piece on the lathe. The result looked like dowels with 1/4 of the material cut out. Below are a few photos of this process.


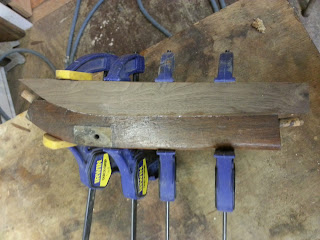
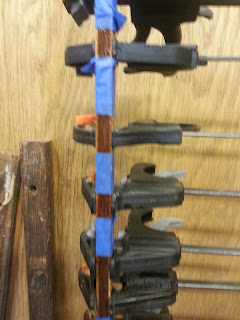
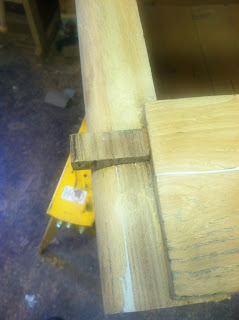
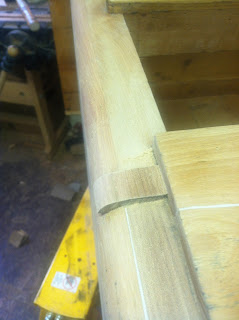
Here the columns are cut to fit the corners of the feet. In the following photo they are being attached
 ( yes, those are zip ties holding the columns in place!).

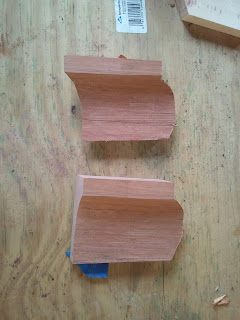
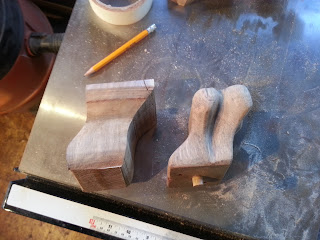
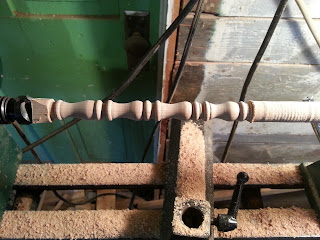
There were several spots along the columns that were also missing. These were in the same locations on either side and measured exactly half of the vase turnings displayed at the mid section on the piece. I decided to turn half vases that echoed the originals to fill these gaps. Below are photos of these vases being turned.

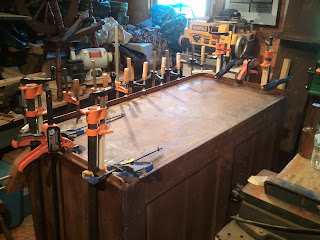
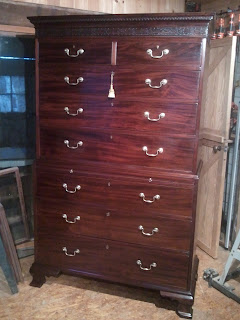
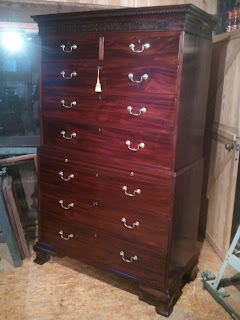
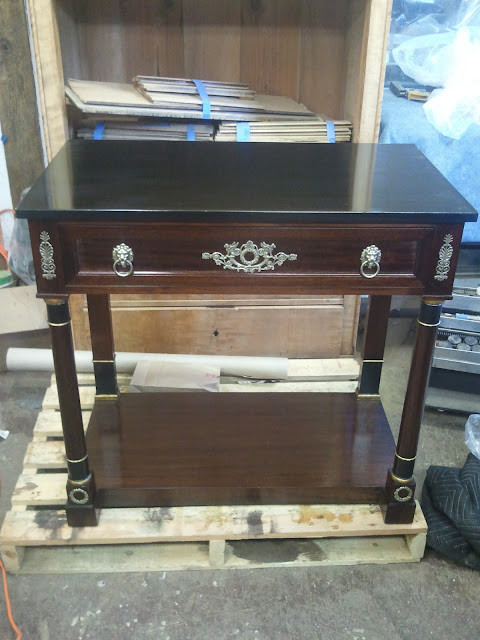
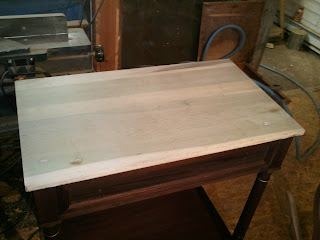
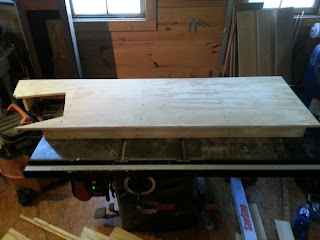
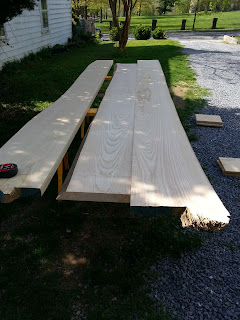
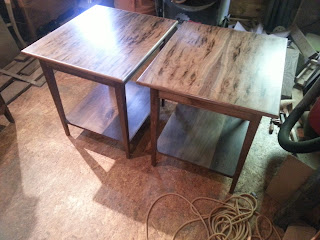
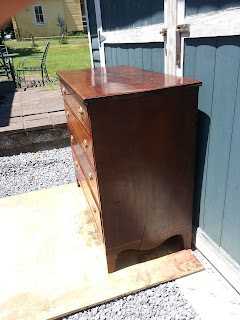
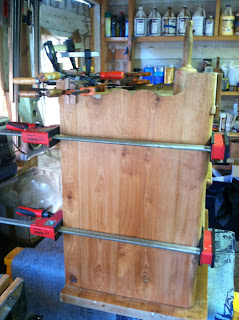
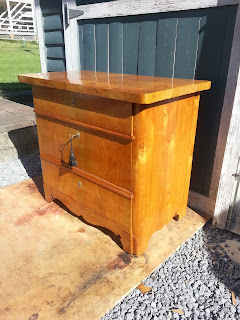
After all of the repairs were made to the case and it was sanded, a French Polish was applied to the case and the final step was to add a coat of paste wax. While I did some of the work on this piece, I would like to acknowledge Jesse Melton, who works with me, for the work he did on this piece. It really turned out well and I think that together we returned this fine desk to its proper condition. Below are a few photos of the desk in the shop followed by several of the desk outside, where the sun does a wonderful job of setting off the beautiful flame Birch veneer.


Walnut Eastlake Side Chair (ca.1875)

$
0
0

The Completed Chair

Recently I restored and repaired a Walnut Eastlake Chair. I put a date of 1875 on this chair but in truth chairs like this were made throughout the United States for most of the second half of the 19th century. It is probably from the fourth quarter of that century and has design characteristics that are associated with the American form of the Eastlake Movement. A search of the label Eastlake on this blog will shed more light on that movement.

I have written about and repaired chairs like this in the past but I thought this one was interesting especially because of the repair. The seat is made from hand woven cane which is woven into a Walnut seat frame. The left side of the frame (facing) had broken along the perforations made for the cane to pass through, which are the weakest part of the frame. The common repair for this is to glue the broken piece on and screw it as well between the perforations. 

This repair works for the short term but more often than not I have seen it fail again after a few years. I decided to try another approach which I have outlined below. But first, a few photos of the chair as it came into the shop.

This photo shows the damage to the seat frame from below.
The first step was to remove the seat frame and the loose components of the chair for repair and gluing. The front stretcher had a crack in it which separated completely. This photo below shows that stretcher being repaired.
This photo shows the seat frame removed from the chair. The broken portion has been removed from the frame on the left.
The individual components of the seat frame are seen knocked apart here with the broken piece on the right.
I used a new piece of Walnut to patch the broken section. The idea was to glue a new piece of Walnut on to the seat frame, but to cut the seat frame back beyond the perforations so that I would have a good solid surface to glue to . The new piece would have all of the perforations in it which I would drill at the end to match the originals.  The new Walnut piece I started off with is seen below.
I followed the general out line of the break on the seat frame and moved it back so that it would completely clear the perforations. This curve was cut to the shape of the seat, but it was cut freehand. The two sections can be seen below after the cut.
Using double sided tape, I adhered the part that I would late discard from the patch to the top of the broken frame component to be used a s a template. This can be seen below.
Using a pattern bit on the router table (the pattern bit can be seen behind the wood. It is blue!) I routed the seat component so that the curve was identical to the unused portion of the patch. After this was done I separated the two pieces and threw away the new wood. The two pieces can be seen in the two photos below. The curve that was cut matches exactly.

The portion of the new wood that was intended to be used as the patch now fit the old wood perfectly. The seat frame and the patch can be seen test fitted below.
This photo shows the patch being glued to the old seat frame.
The two pieces adhered after the glue had dried.
Once the patch was glued in place, I then used the component from the opposite side of the seat upside down as a template to cut the inner curve of the patch. This can be seen below in the next two photos.

This next photo shows the patch with the inner curve cut to match the inside of the original. I was also able to copy the spacing for the perforations onto the new wood while the two sections were adhered with tape.
The completed patch. One last detail was to round the inside edge of the patch so that it would not be sharp against the new cane.
This photo shows the chair after it was reassembled. The patch is on the left and is touched up so that it matches the original finish on the seat frame. The following photo is a of the seat frame in detail.

These last three photos show the completed chair with a new woven cane seat. When I picked up this chair from Chris Frear, my caner, she informed me that she was going to be retiring from chair caning from here on out. I would like to take this opportunity to thank Chris for all of the beautiful work she has done over the years for me and the rest of the local community. She always gave me a perfect new seat and she did so with a smile on her face! Thank you, Chris!


Walnut End Tables (2013)

$
0
0

The Completed Tables

In 2012 I was commissioned to built two end tables to go on either end of a sofa. The customer specified the dimensions that had been desired and also the general idea of the style and function of the tables. In addition, the customer also provided the Walnut lumber for the project. This Walnut is the same wood I used to build a hall tree last year. Here is a link to that project:

http://johnmarkpower.blogspot.com/search/label/Hall%20Tree

The Walnut was milled in Cumberland, Maryland sometime about 50 years ago according to the customer. The customer also informed me that the wood was steamed. The customer went on to tell me  that the process of steaming the Walnut involved burying the Walnut in it own shavings in an effort to darken the sapwood. I had never heard of such a thing and decided to investigate. What I found was that steaming Walnut is primarily done on a commercial level in an effort to maximize yields of clear Walnut lumber. The clearest wood (free of knots and defects) is on the outside of the log. This is also where the sapwood of the Walnut is which is a pale creamy color. By steaming the wood in a closed environment, the sapwood takes on the color of the heartwood and gives the board a uniform color. For a more detailed explanation of this process, follow this link:

http://www.woodcentral.com/articles/reviews/articles_894.shtml

what I find amazing about this is that, like many other aspects of woodworking, There is controversy concerning this practice. Some woodworkers feels that this makes the wood to uniform in color and robs it of some of the delicate colors that can be found in Walnut. While I can see their point, I found this wood to have a very pleasing color and its workability was great. Besides, as you will see by reading below, this wood had a lot going for it anyway!

Now that that is out of the way, back to the story. When the customers proposed the idea of these tables to me, the first thing that I thought of were two boards that I had milled when working on the hall tree. These boards had amazing figure and curl and also had evidence of bore holes left by the ambrosia beetle and the corresponding ghostly rings that surrounded them. In essence, these boards were very beautiful. I made some calls and found a sawyer willing to resaw them so that they could be bookmatched. This resawing would double the surface area of the boards giving adequate space to make a two board top. The only problem was that by resawing them I reduced the boards thickness to about 1/4 of an inch. To thicken these boards I decided to glue them like veneer to a stable substrate, in this case MDF (medium density fiberboard). To conceal the MDF, an edge banding would surround the edge of the top made from Walnut. The apron for the table would be pretty straight forward but have an applied bead around the bottom. ( a favorite element of mine, because it gives a feeling of termination to the bottom edge of the apron.)

The legs would have a simple taper on the two inside faces and suspended near the bottom would be a shelf to store books and such. After all of the design elements were approved by the customer, I drew the tables in SketchUp to give the customers a plan to okay and for me to work out all of the details (or most of them). Below are the resulting drawings of the tables to be made. You can click on the individual photos to enlarge them.


After the boards were resawed, I laid the two tops out and determined the best layout. The idea of bookmatching is that you take a board, slice it in half, and open the two halves like a book. When this is done each half is the mirror reflection of the other half. Below are the two bookmatched sets laid out. The white chalk lines were drawn to help me with lining the tops up when it was time to glue.

Here is a snapshot of the rest of the lumber used for the project in its rough form. In the photo below are the boards singled out and cut for the legs. I just had enough material!

After the tops were glued, I needed to cut a groove into the edge on all four sides. The edge banding would have a corresponding tongue on it that would fit into the groove. The photo below shows that groove being cut initially on the table saw. I later used a router to clean it up. The photo below shows the groove in the edge.

The edge banding can be seen be below. It was shaped to a half round profile and had the tongue on the inside edge to fit into the groove. The banding can be seen below. The following photo shows the banding in cross section so you can see the profile and the tongue.

This next photo shows the banding being glued in place. The blue tape holds the banding in place in addition to the clamps on the corners.
With that, the tops were essentially built. After milling the lumber for the base, I set about cutting the tenons on the ends of the aprons. All eight aprons can be seen side by side in the photo below.
Each tenon was cut with the top shoulder set back. This allows more wood to remain at a weak part in the leg surrounding the mortise and makes for a stronger leg.
The tenons were also chamfered so that they would not interfere with each other when they were in position. The top of the leg is 1.5 inches square, so there was not a lot of room to put the tenons, by chamfering the edges, the diagonal faces met but did not intersect. This can be seen in the two following photos.

This photo shows the tables dry assembled. There were many steps to make before I was ready to glue them, but the joinery all worked out great!
after tapering the legs on the table saw, I needed to figure out a way of suspending the shelf between the legs. I agonized over this a bit, and decided to go with a method that would result in the least amount of material being removed from the legs themselves. Near the bottom, the legs are about 3/4 of an inch square, so removing any material would weaken the legs.

The method I eventually decided on I had seen on a Victorian table I restored a few months ago. Wooden paddles were made that tapered down to a round tenon that would fit into a corresponding hole drilled into the inside corner of each leg. The flat part of the paddle would lie beneath the shelf and be attached with a screw. The corners of the shelf would be notched out to receive the legs and the notches would be cut at an angle to match the leg taper. Sounds simple enough, right?

Below are the boards used for the paddles. Four paddles to each board. I decided to make these using the band saw and the router rather than the lathe, but either method would have worked.
Here are the boards after the bandsawing and routing was done.
I then separated the board into the paddles, as seen below.
As for the hole drilled into the inside corner of the leg, I made a v-shaped cradle to hold the leg and used a band clamp to fasten the leg while I drilled the hole on the drill press. Here is that set up.


This next photo shows one of the two shelves after glue up. In an effort to conserve materials, I was less picky about matching the color on these boards. Instead, I made the color variation into a design feature. On both shelves, I used the same boards, but I reversed the layout, so that when the tables are seen together, the boards shelves reflect each other. Not quite bookmatching, but a solution that utilized a limited resource.
This photo shows the legs and aprons laid out for gluing. The blue tape on the legs shows me where each part goes. The blue tape on the aprons is to keep excess glue from spreading onto the apron.
Gluing up one of the bases.
After the bases were glued, I attached the bead around the bottom of the apron and then attached the shelves. The paddles can be seen in their new location in the photo below.
Here is a photo of the two bases glued up with the shelves in place.
The next three photos show the tables fully assembled and sanded.


These next three photos show the tables during the finishing process.


A new signature was developed for these tables as well. Beside my signature I inset a penny with the current year on each table so that down the road people will know when the table was made. This signature is located on the inside of the apron.
 
And finally, these last photos show the completed tables.


Virginia Walnut Four Drawer Chest (ca.1800)

$
0
0
The Completed Chest of Drawers
A few months ago I went to a local auction where a Walnut four drawer chest of drawers was being auctioned off among other items. At first I went with a mind to purchase it if the price was right, but ended up buying some locally made chairs instead. The chest was purchased by a friend of mine who asked about restoration on the spot and I ended up loading the chest into my van and taking it back to the shop.

The chest was a real diamond in the rough. There were many condition issues including missing hardware and inlaid escutcheons. The new owner of the piece and I met in my shop to discuss the restoration and decided that a conservative approach should be taken, mainly to replace the missing parts and to try to bring the chest to a point where it as functional and complete, but still had the presence of a 200 year old chest.

The chest was a classic four drawer chest which was a very popular form along the eastern seaboard  from the mid 18th century well into the 19th. Judging by the design of the chest and use of the French foot, I determined that this is what is referred to as a Hepplewhite chest and probably made shortly after the turn of the 19th century. The chest was purchased in Loudoun County and was probably made there or in one of the surrounding counties. 

Despite all of the condition issues, this chest had sound construction and looks to have very little work done to it over the years (with the exception of the addition of some store bought wooden knobs). The case was built with dovetail joinery and as is typical of these chests, the top was attached with the use of a sliding dovetail joint. Where nails were used they were cut nails and in some places Rose head nails were used, indicating an earlier date of manufacture. Below is a photo of the chest before it was purchased.
These next few photos show the chest in my shop before any restoration work too place. In the detail photos you can see the veneer loss to the apron and the front legs. In fact, most of the front leg on the right side was missing and the left side was only a little better!


I started by getting to work on the interior drawer runners. The originals were still intact on the left side of the chest and the replacement interior runners on the right side had been made from some scrap molding that was turned upside down to expose one of the flat sides. This was probably done sometime in the early 20th century. All of the runners were dished out where the drawer runners had worn the interior runners down. In certain cases you can flip the boards to expose the flat underside but these were really too far gone and so I decided to replace them using reclaimed Heart Pine boards. Below is a detail showing one interior runner made of Walnut. The board should be flat but 2oo years of use has carved most of the board away. the Walnut runner was the only example using Walnut, the other two original runners were made from Heart Pine.
The next three photos are taken of the interior of the case and show the dados that hold the interior runners and then the new runners glued in place.


In addition to the damage on the interior runners, the drawer sides were equally worn and needed to be repaired if the drawers were to work correctly. Again, reclaimed Poplar was used and efforts were made to match the grain and tone of the wood to the original. Below are some photos of the repair process.


Several drawers were loose at their joints and needed to be glued. The photo below shows one drawer disassembled. The two board bottom of the drawer was tongue and grooved and the two boards are seen in the photo below side by side connected to the front and back boards of a drawer. The following photos show the drawer cases being glued up.


On to the detail work! All of the inlaid escutcheons were missing and by looking at other examples and the detail wood used in this piece, I decided to replace them with 100+ year old Maple veneer. Maple was most likely used originally. Below is a photo of the drawers with missing escutcheons.
A tracing was made for each escutcheon and adhered to the Maple and then cut out.
This photo shows a dry fitted maple diamond escutcheon.
The following photo shows the four Maple escutcheons being glued in place.

After the glue had dried, I cleaned off the excess hide glue and the escutcheons were in place.

The last step was to cut the keyholes in each escutcheon and the results can be seen below. You can also see how much dirt and wax was removed around the escutcheon area by the hot water used to clean the excess glue. Later in the restoration the drawers were cleaned and this evened out.
The drawer dividers are fitted into the case using a half dovetail joint as seen in the photo below. Originally, these joints would have been covered by a thin piece of Walnut trim running vertically and glued to the front edge of the sides. On both sides, these strips were missing. The customer supplied me with a 19th century bed that we cut up for Walnut with a similar tone and surface. The wood matched beautifully! The photos following the photo below show the new strips being fitted and glued to the case.


The skirt of the case was originally veneered with Walnut veneer. Much of it had buckled and been lost. Below are some photos of the veneer replacement using veneers made from the bed rails of the 19th century bed. Not only was the color and surface right, but I could cut veneers to thickness rather than using modern thin veneer and having to build it up.


Above the skirt and across the sides was a homemade band of stringing that was composed of a piece of Walnut sandwiched by two lines of Maple. Much of this stringing was missing as seen in the photo below.
I glued up a long line of it using the Old maple veneer I had and the Walnut from the bed. I used tape and clamps to glue it all together as seen in the two photos below.

After the stringing was glued, I ripped appropriate thicknesses of it on the table saw and set about inlaying it in the groove on the chest. Where a crack intersected the stringing, I broke the stringing so that it followed the natural wear of the chest.
The next three shots are some random repairs. I think they mostly were gluing glue blocks in place.


After all of the repairs were made, I cleaned the finish and added a few coats of  shellac to bring the finish back to a good look. the object was not to erase the wear, but to retain it and seal the finish to protect it and also shine it up a bit! The photo below shows the chest during this process.
The completed chest in all of its glory! It really looked great when all was done and it was a pleasure to bring this fine piece back to a usable condition. It was also great to work on a local piece and much time was spent musing on the character of the original craftsman.
Special thanks goes out to Nancy Anderson of Londonderry brasses. She found the perfect pulls for this chest that fit the original holes perfectly. Most chest like this would have had oval pulls, but this one appears to have originally had rare round pulls. The shadows of other pulls in the photo below were from subsequent pulls including the wooden pulls that were on the piece when it first arrived in my shop. Thanks Nancy!
A nice period key fit to one of the original locks. Above you can see a piece of wood missing from the drawer divider. I was very selective with what I did and did not repair so that the age and wear of the piece would be maintained.
Some additional photos of the chest can be seen below.


Biedermeier Three Drawer Chest (Ca.1830)

$
0
0

The Completed Chest

One of the recent pieces to come through the shop was a Beidermeier chest of drawers. The chest was made of Elm and Pine and was veneered with bookmatched Elm veneer. Judging by the style of lock used and case construction methods used, I dated this piece to around 1830, however it could be a little earlier or later. The chest has many issues when it came into the shop.The chest had loose and missing veneer across the entire case as well as many other structural repairs one would expect to see on a piece of this age. In addition, the finish was very worn and close examination revealed that there were orbital sanding marks in the wood left by a electric random orbital sander, indicating that the finish was not original. With this in mind the finish was removed and the entire case sanded after the repairs were made to remove the orbits. Below are a few photos of the chest as it came into the shop.

The photo below shows a large section of loose and missing veneer on the top. This was later lifted, cleaned, reglued, and patched where the veneer was missing.
This photo shows the top when it first came to the shop. The area photographed above can be seen on the right side of this photo.
The front skirt of the chest was a solid em board that was applied to the front of the case. The feet, which were originally supported by glue blocks, were broken off. Fortunately the customer had the feet.


This next photo shows one of the broken feet being attached to the case.

The drawers showed significant wear on the bottom edges of the sides from rubbing on the interior drawer runners. The worn wood was removed and patched with new pine. The two following photos show the new wood being glued in place.

A variety of clamping operations can be seen in this photo. On the top, patches are being glued in place. Inside the case a clamp can be seen holding several lengths of 2x4 lumber against an interior runner that was being glued in place. Also visible in this photo on the left side of the case is a long wedge driven into a gap between two boards. This wedge was glued in place and pared down flush with the side of the case once the glue had dried. The gap had occurred due to shrinkage between the two boards over time.
The entire bottom of the case was missing the corner blocks which act as feet. The blocks are visible in the front so Elm was used. Below is a photo of the block being glued in place. It was later carved to match the rounded profile of the case.
After the block was glued the broken section of the foot was re attached, as seen in the photo below.
Above the feet on the front of the case were two rounded elm appliques that were decorative in nature. One was missing entirely and the other disintegrated while being patched. Both were replaced with Elm as seen in the photos below.


The next three photos show the rear corner blocks being glued in place. The last photo also shows several other clamping operations.


This photo shows the case repaired and sanded.
These last photos show the chest completed with a French Polish. The replacement escutcheons were provided by Nancy Anderson at Londonderry Brasses (http://www.londonderry-brasses.com ). They really fit the style of the chest well. Thanks also to Jesse Melton, who completed most of the work on this piece. Good job Jesse!


Lenzkirch Wall Clock (ca. 1878)

$
0
0

The Completed Clock

A piece I recently worked on was a German Wall Clock made by the Lenzkirch Clock Company ca. 1878. The clock had several markings on the movement which shed light on to the age of the clock. The first marking found said "D.R.P. May 21 1878". D.R.P. is short for Deutsches Reichspatent which is a German patent prior to May 1945. With this in mind the earliest possible date of manufacture of this clock would be after the patent date.

Below this marking were stamped the numbers 8160. This is a model number for the movement and not a serial number. According to a website on Lenzkirch clocks, the serial numbers were around  627,912 by this time. A little research showed that this model was a spring wound wall clock with an asymmetrical arbor. The asymmetrical arbor was probably an attempt to maintain the torque on the mainspring, allowing the clock to keep a more constant time. 

The other stamp on the clock was the name Lenzkirch and the letters A.U.G. . The initials stood for  Aktien (Stockholder), Uhrenfabrikation (Clock Factory), and Gesellschaft (Corporation). All of this show that the movement was made by the Lenzkirch factory in the late 19th century. 

The case for the clock was made of pine. The outer ring of the clock was made of Elm and had a brass bezel ring which surrounded the flat bezel. The clock face itself was painted on metal and had roman numerals indicating the hours. The hands were steel moon style hands.

After all of this information was gathered, I set about my task of restoring this clock. In addition, I was asked to replace the movement with a modern quartz movement so that the clock would keep good time and would not have to be wound. The clock hung high on the customer's kitchen wall so winding it was a chore. 

I had no problem with doing this because I was able to replace the movement without permanently altering the clock. I did this by first removing the movement and then replacing it with a wood block that the quartz movement would attach to. The face would then attach to the new movement. I was even able to find moon style replacement hands for the new movement (nice, but not as nice as the originals!). The procedure of switching the movements was relatively straightforward and allowed for the clock to be admired as well as used. I then cleaned the glass and the case of the clock and returned it and the movement to the owner. Below are some photos prior to the case being cleaned followed by some photos of the movement and the completed clock.

This photo shows the clock as it came to me.
The original movement and the chime removed from the clock.
The next two photos show the stamps on the clock movement.

This block was used to attach the new movement and position the face in the right place.
The completed clock with the new moon style hands.

Here is a link to a website on the Lenzkirch Clock Company: http://www.lenzkirchclocks.com/

The company closed its doors in 1933.

Louis XVI Gilt Frame (ca. 1830)

$
0
0
The Completed Frame
Another recent piece to come through the shop was a Gilt Louis XVI frame. While the frame is in the French style and has several decorative motifs that would put it solidly in the Louis XVI period, It framed a portrait of a young German woman dressed in the Biedermeier fashion. The portrait had a label on the back side from the 20th century saying that the portrait was ca.1830 and the frame was Louis XVI. I am in complete agreement with this statement. Whether the frame was made in Germany or was imported from France is anyone's guess, and either case is plausible.

The frame was cracked in many places and the decorative bow that sat on the top of the frame was extremely damaged, with lots of loose and missing portions. While I neglected to get any good photos of the restoration process, I did get a couple of nice before and after shots as well as a few photos of the portrait and the restored frame hanging above a Biedermeier desk we restored earlier this year. All of these can be seen below.

This first photo shows the frame as it looked when it arrived in the shop. The frame was built of several curved sections joined together. The glue holding these pieces had failed causing cracks in the frame. There were also many chipped sections where the gilding had fallen off.
 
This close up of the decorative bow shows missing portion and breaks. All of these were patched and carved to match the original. The entire bow was also cracked and the wire that it was built around was loose in many places. This was all secured and patched as necessary. 
 
  Below is the portrait of the young German woman in Biedermeier dress.
A close up shows the detail in the portrait.
The label on the back saying that this is a portrait of a Biedermeier woman in a Louis XVI frame ca. 1830.
These next two photos show the frame restored and cleaned.

This photo shows the portrait returned to the frame and hanging in the customer's house.
This last photo shows the frame hung above a Biedermeier desk restored earlier this year. Here is a link to the restoration of that piece:

 http://johnmarkpower.blogspot.com/2013/05/biedermeier-secretaire-abattant-ca1820.html


Cedar Lawn: English Rosewood and Mother of Pearl Wheel Barometer (ca.1850)

$
0
0
 

The Completed Barometer

 In the past year I have restored several pieces for a home in Jefferson County, West Virginia called Cedar Lawn. to view more posts concerning this home, please click on the label "Cedar Lawn".

This post concerns a Barometer we restored a few months ago. The barometer is veneered with Rosewood and that veneer is inlayed throughout with mother of pearl fretwork. besides the barometer itself, The case also housed a thermometer, a damp gauge, and a level. An almost identical barometer was recently sold and was credited to Negretti and Zambra, a London Firm specializing in scientific instruments. A link to that Barometer can be seen here:


The following link shows the Wikipedia page on Negretti and Zambra:


It is possible that this barometer was made by someone else, or that it was made for a retailer that chose not to have the companies name on the case. Another possibility is that it had a paper label that is now lost. At any rate, It is most likely that this barometer was made by or for Negretti and Zambra. 

The barometer had many condition issues when it came to the shop. The convex bezel glass that housed the silvered hydrometer dial was missing as was the curved rectangular glass housing the thermometer. The case itself had loose veneer and was missing part of the mahogany crown molding. In addition to all of this, the thermometer glass was cracked and the barometer tubes in the back were also cracked.

The replacement glass was custom made by Carter Holder,of New Port Richie, Florida, who is as far as I know the only person in the country who can make this type of glass. The result was quite beautiful to behold and was of fine craftsmanship.

The barometer tubes were replaced by Eastern Standard Time, of Purcellville, VA. All other work was done in house and can be seen in the photos below.

These first few photos show the condition of the case when it arrived in the shop. Note the missing mother of pearl in each photo. Replacement pieces were carefully cut using a jeweler's saw and glued in place using hide glue. All of the loose rosewood veneer was also glued down using hide glue, an appropriate glue for such work.


Below is a the replaced section of crown molding carved out of mahogany, like the original. It was later stained to match the color of the rosewood the way the original section would have been stained.
These next two photos show some clamping operations in which loose veneer was glued down and replacement inlay was glued in place.

The finish on the mahogany pediment was in very bad shape and could not be restored, so it was removed and replaced with a french polish. The finish on the rest of the case was restored and French polish was added to the original finish. the pediment can be seen with the finish removed in the photo below. You might notice that the example I linked to above has a brass finial. I saw no evidence of a finial on the pediment so decided not to put one on.
This shot shows the barometer case with the various instruments removed. The tools used to repair the case are seen scattered around on the bench.
Before installing the various instruments, all of the glass was cleaned and the brass surrounds were polished. Below are two photos of the damp gauge before and after cleaning.

These last few shots show the completed barometer hanging in Cedar Lawn.


Viewing all 57 articles
Browse latest View live